

RULEBOOK
SECOND EDITION
SECOND EDITION
Frank Herbert's classic science fiction novel Dune will live for generations as a masterpiece of creative imagination. In this game, you can bring to life the unique desert planet and the swirling intrigues of all the book's major characters.
Dune — the very name conjures up desolation. Desert sandscapes cover most of the planet's surface, broken only by giant rock ridges. Giant sandworms a quarter mile long live beneath the sand and attack any who linger on it. Human life exists in a few scattered places where precious water is available, but even those settlements are buffeted by terrifying coriolis storms.
Yet the planet is crucial to the destiny of a galactic empire. Because only on Dune can spice be harvested.
Spice is the key to interstellar travel. Only by ingesting the addictive drug can the Spacing Guild Steersman continue to experience visions of the future, enabling them to plot a safe path through hyperspace. Spice is also a geriatric medicine that prolongs life. Only by assuring a stable supply of spice throughout the galaxy can any Emperor avoid civil revolt. With spice, in short, one can buy whatever one wants.
Powerful forces struggle for control of Dune. Imperial troops, aristocratic families, Guildsmen, a secretive sisterhood, and the nomadic native Fremen all vie for power on the planet.
All are subject to the rigid economics of the joint merchant combine, CHOAM; resources are expensive, shipping is costly, excellence has a price. And that price must be paid in the universal currency, the measure of all value: spice.
All need spice. Some will harvest it directly when it blows in an isolated area of sand, risking the onslaught of sandworm and storm alike.
But others will take it violently in battle, or quietly in taxes and fees.
Those controlling the cities will have access to ornithopters and cover great distances quickly. Other players will have to pick their way slowly across sand and rock.
But all anxiously await the decision-making Nexus signaled by the sudden appearance of the great sandworm, Shai-Hulud.
Massive battles and small skirmishes will occur, but often be decided by a single brilliant leader or an act of low treachery.
But death on Dune need never be tragic. The dead are routinely rendered up for their body's water — so that life on the arid planet may continue. And even one surviving cell of an individual may be cultured by the Tleilaxu technicians until the original person is regrown.
Dune has long been celebrated for its unique blend of strategy, negotiation, and theme, and this edition makes it easier than ever to learn and enjoy what makes the game so distinctive.
This edition refines and streamlines long-standing systems, clarifies edge cases, and preserves the depth and tension the game is known for, while addressing areas that have generated discussion over decades of gaming.
When Dune was first released in 1979, it had a single ruleset with several optional additions. By 2019, these had been divided into Basic and Advanced rules. This edition aims to return to one unified system that reflects how most people actually play, while keeping the best elements of both approaches.
The biggest change is combat. The original system was elegant and intuitive, while the advanced version added spice as an extra factor but became more complex and sometimes clunky. This edition introduces a revised combat system that keeps the original simplicity while adding a streamlined spice element to preserve that extra layer of strategy. For veteran players who prefer it, the original advanced combat ("Spice Dialing") is still available as a variant.
Another major update is the Karama card. Previously, it tried to cover too many effects, leading to confusion and inconsistent rulings. It has now been split into two cards, Karama and Solaris. The Karama effect has been simplified so it cancels just one key faction ability, making gameplay clearer and easier to manage, while Solaris contains the additional effects that were part of the original Karama card.
Some terminology and naming have been improved for clarity, theme, and consistency. For example, "projectile" has been changed to "kinetic," some locations have been corrected, and many faction abilities have been renamed to better reflect their purpose.
Lastly, factions have been lightly updated based on years of player feedback and tournament data. Most remain very close to their original design, with small tweaks to improve balance and playability.
Overall, the goal is to keep what has worked for decades while making the game smoother, clearer, and more accessible.
—The Future Pastimes team.
To future-proof this rulebook, some rules reference expansion factions such as the Ixians, Ecaz, and Moritani. These have been developed alongside this second edition and will be released in future expansions at a later date.
When playing using only the contents of this box, you can safely ignore these references.
Peter Olotka, Jack Kittredge, Bill Eberle
Greg Olotka, Jack Reda
Peter Simunovich, John-Paul Brisigotti
Thanks to Bernhard Beyer, Austin Childree, Davide Cossu, Kinner Flaglor, Chris Hernandez, Tautrimas Karickas, Nicholas Klusener, Steven Koblinsky, Art Lailey, Nathanial McConnell, Gary Munroe III, Christian Prater, Whitney Prater, Caelan O'Toole, Viktor Sandner, Zevon Scocco, Ben Stapleton, George Stiff, Mike Waisner, Brett Wiemken, The North Shore Gamers: Greg Schmidt, Joe Don Richardson, Rowan Miller, David Kuznick, Bob King, John Grubb and Alex Bowers
Joe LeFavi
Matthew Vaughan
Casey Davies, Victor Pesch
Ilya Baranovsk, Solveig Reda, Lochen Reda
Vicki Tunkel
Ian Allen, Robert Blance, Richard Foster, Reid Pittams, Simon Paton, and the Battlefront Studio Team.
Ian Allen, Davide Cossu, Andrew Gallie, Brad Johnson, Chris Larr, Sam Newman, Zevon Scocco
Brian Herbert, Kevin J. Anderson and the Herbert properties team.
Elie Dekel, Lisa Lilly, Eric Morreel and the Legendary team.
Games Design © Gale Force Nine 2026. Gale Force Nine is a Battlefront Group Company
DUNE © 2026 Legendary. All Rights Reserved.
MO SF
museumofsciencefiction.org
In association with the Museum of Science Fiction.
You will be one of these factions:

The Atreides, led by the compassionate, though cunning, Duke Leto and his son Paul Atreides — rightful heir to his family's ancient legacy, gifted with valiant lieutenants and a strange partial awareness of the future. Both are beset by treacherous opponents.

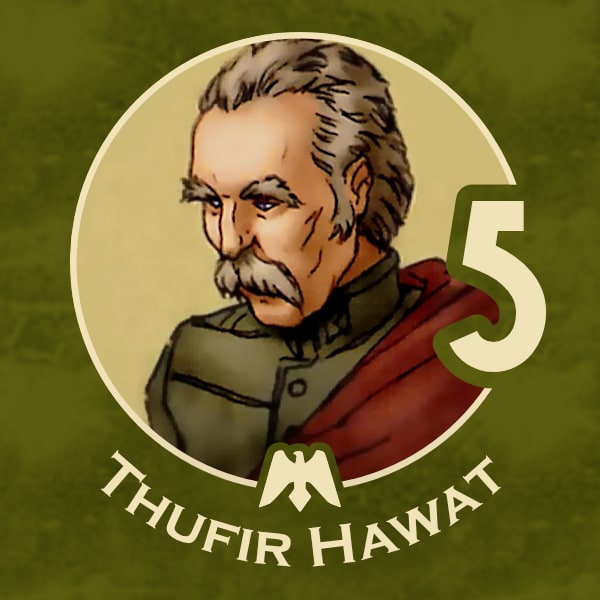





The Bene Gesserit Sisterhood, represented by Reverend Mother Gaius Helen Mohiam — ancient and inscrutable, carefully trained in psychological control and a genius at achieving her ends through the efforts of others.







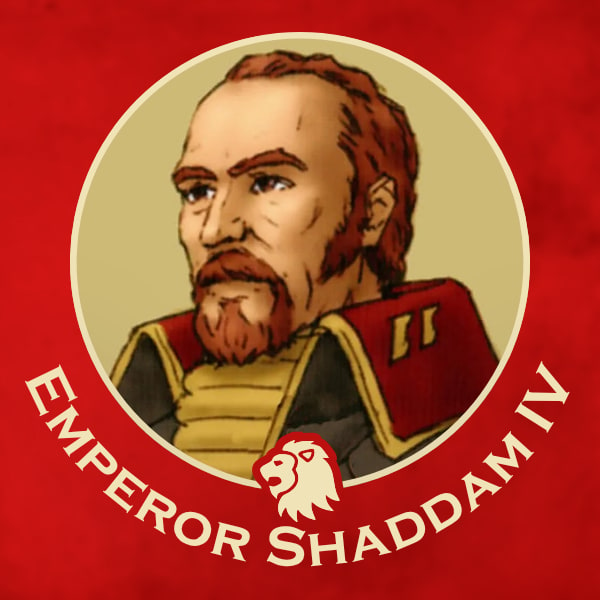
His majesty the Padishah Emperor Shaddam IV — keen and efficient, yet easily lulled into complacency by his own trappings of power. By leveraging his legions of Sardaukar, the Emperor will secure his legacy.



The Fremen, represented by the planetary ecologist Liet-Kynes — commanding fierce hordes of natives, adept at life and travel on the planet, and dedicated to preventing any outside control while bringing about Dune's own natural regeneration.


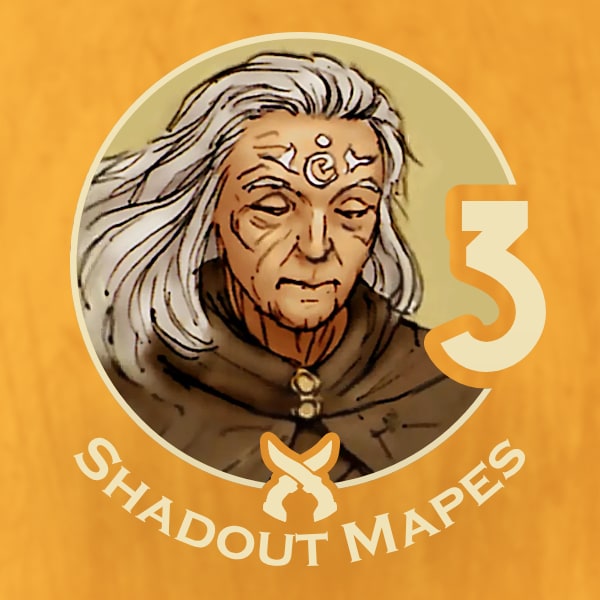
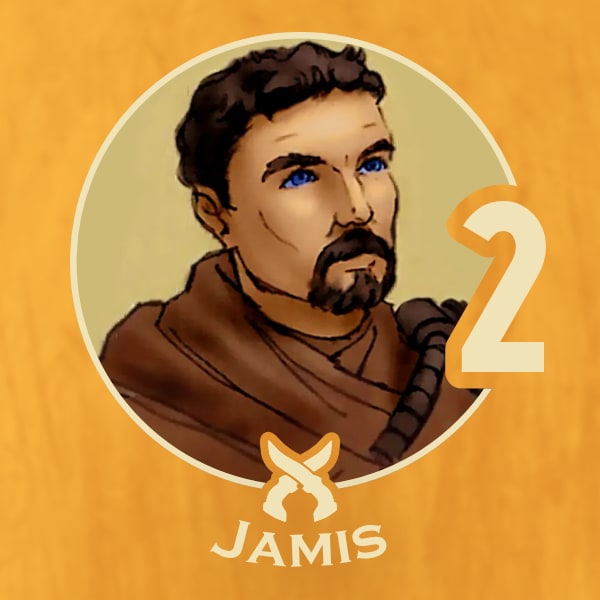

The Spacing Guild, represented by Navigator Edric, monopolist of transport, yet addicted to ever increasing spice flows, must ensure that trade continues unabated.


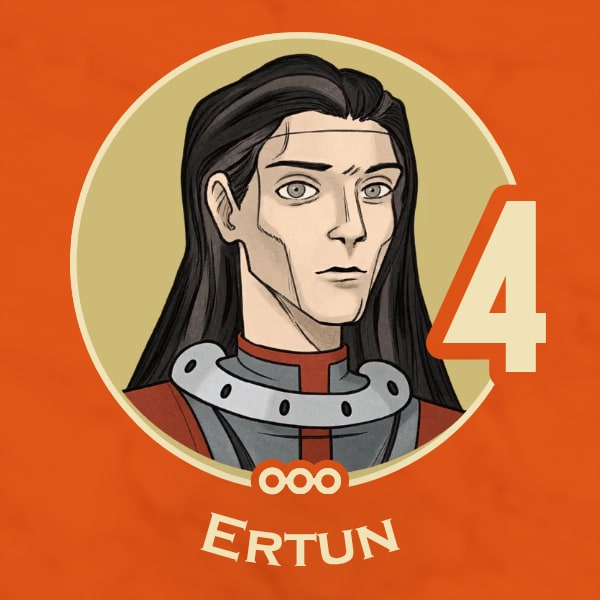
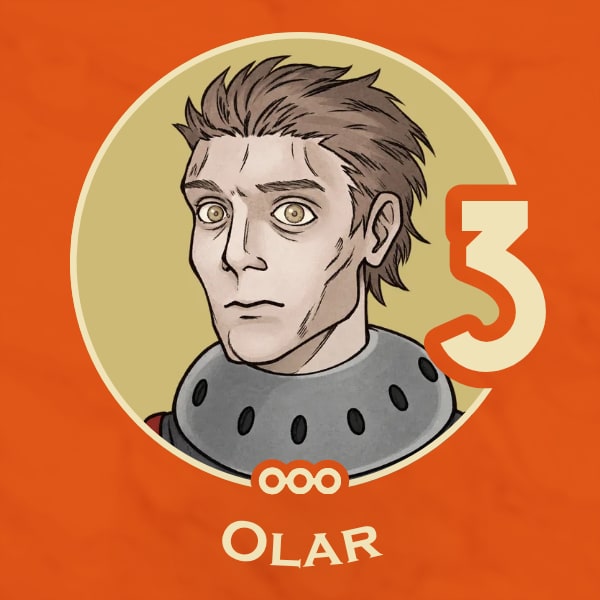

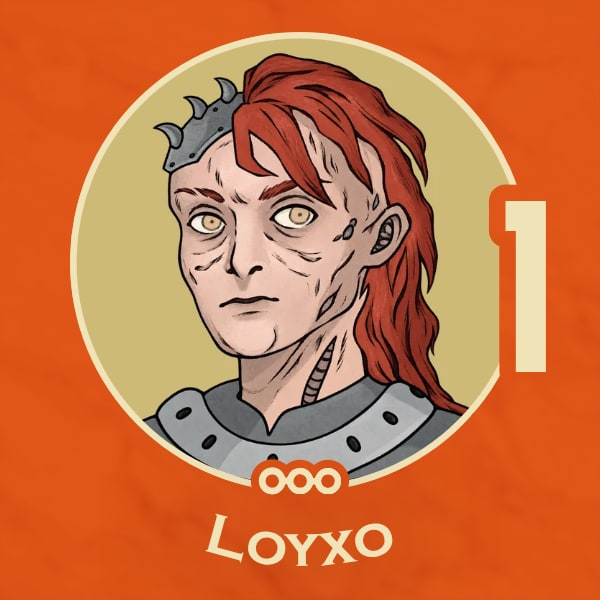

The Harkonnens, led by the decadent and notoriously cruel Baron Vladimir Harkonnen — master of treachery and sinister deeds, value power over all. The path to power leads to Arrakis, and the control of spice.

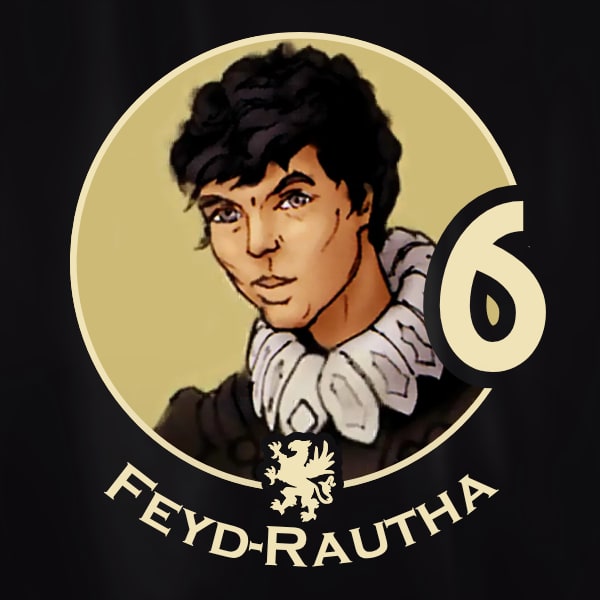




In DUNE, A Game of Conquest, Diplomacy & Betrayal, you take control of one of the great houses or factions seeking to control Arrakis.
Each faction has a set of unique economic, military, strategic, diplomatic, technological, or treacherous advantages. The object of the game is to use these advantages to gain control of Dune.
The winner is the first player to occupy at least 3 strongholds with at least one of their forces during the Mentat Pause phase (or 4 strongholds for an alliance- see Alliances page 21).
If a tie occurs (e.g., with the Ixians' Hidden Mobile Stronghold in play-from the Ixian and Tleilaxu expansion), players must agree to play another round or end the game in a tie.
A player may win alone or in an alliance with another player.
If at the end of round 10, no faction or alliance controls the required number of strongholds, or wins through a unique Special Victory Condition, the winner is the alliance or unallied faction that controls the highest number of strongholds. Break ties first in favor of unaligned factions over alliances, and second in favor of which side has the highest number of forces in their controlled strongholds, finally by who has the most spice - see Hierarchy of Winning on page 20.
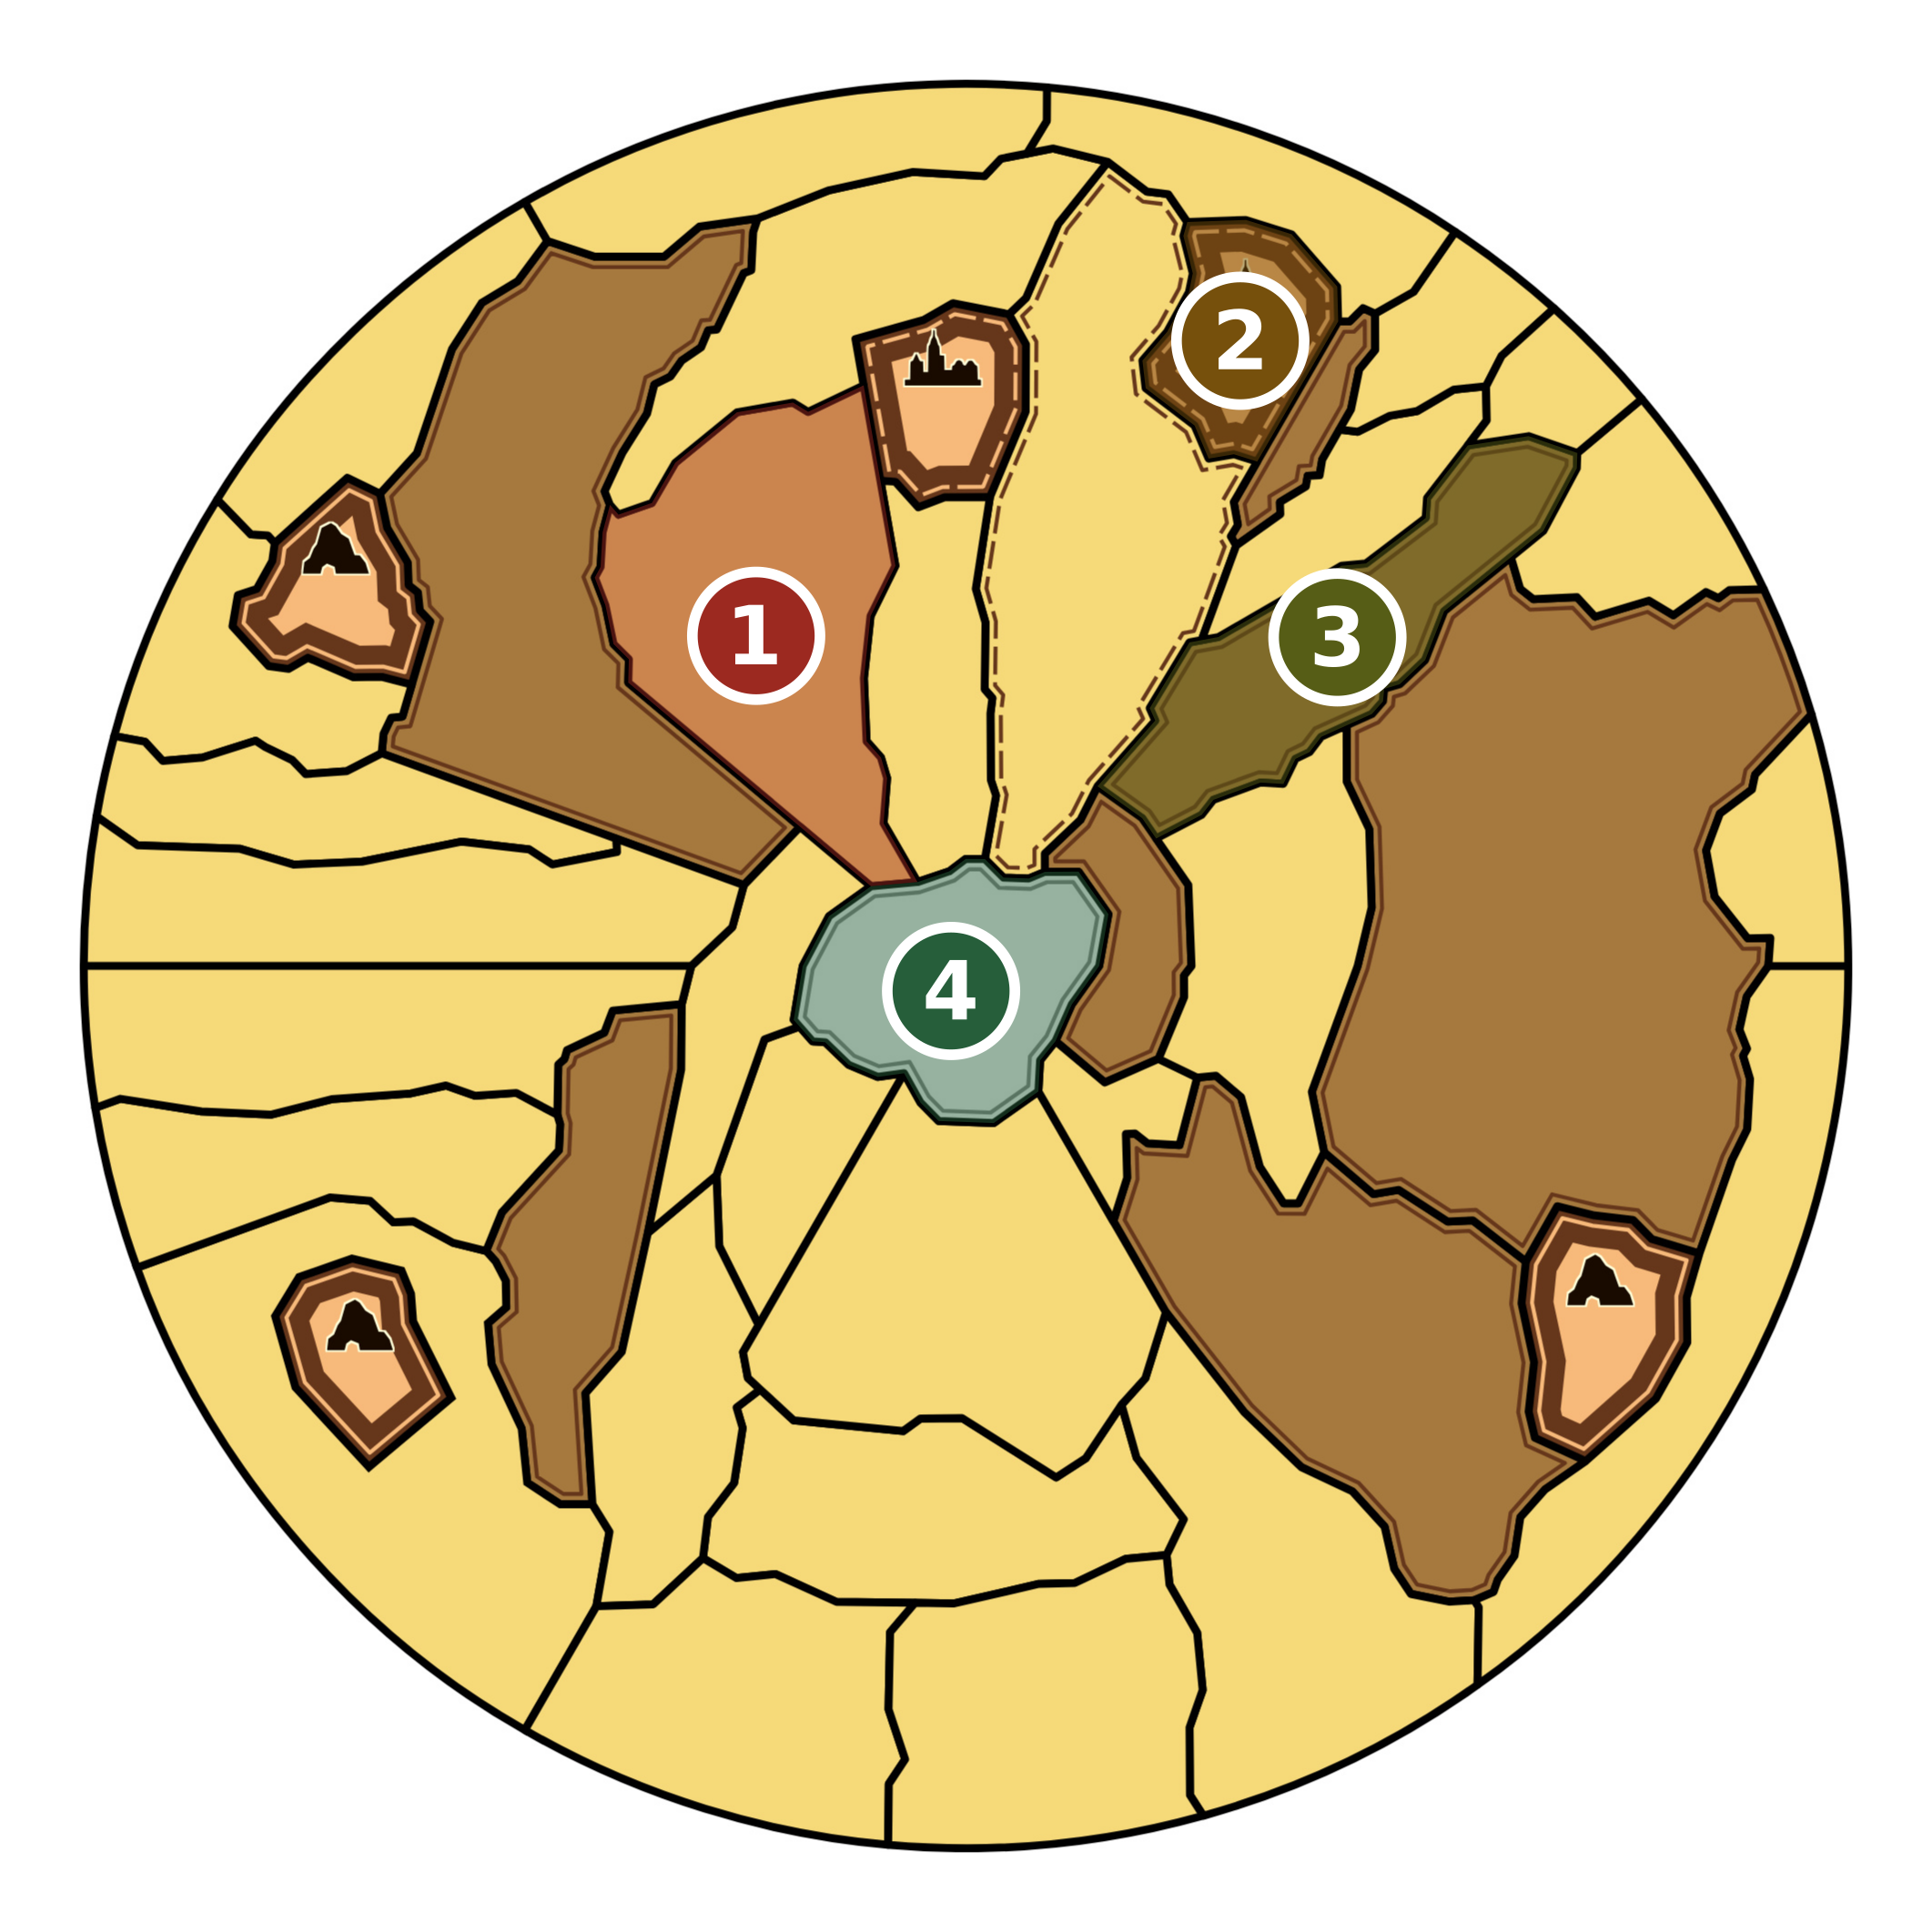
The game board is a map of the planet Dune showing four types of territories:
Sand: Yellow or tan with a single border.
Rock: Brown with double borders.
Strongholds: Red brown with triple borders.
Polar Sink: Mottled white with a double border.
Some territories are marked with a Spice Blow icon to show the locations of possible Spice Blows.

The map is also divided by longitude lines into eighteen sectors, which extend from the edge of the Polar Sink to the equator at the edge of the board. Sectors control the way the storm moves around the board. Note that some territories can span more than one sector.
There are six player circles around the map to help determine play order. The map also includes a Round Track and the Tleilaxu Tanks for holding dead leaders and forces awaiting revival.
Additionally, there is a yellow line starting at Broken Land, going down around the Polar Sink, around Cielago West and out by Habbanya Erg. This indicates where the Fremen can make their Force Shipments to.
Sand
Strongholds
Rock
Polar Sink
Territory: a named, outlined area, such as Hagga Basin. A sector is the wedge between two longitude lines running from the Polar Sink to the outer edge.
On the printed board, look around the map for the Round Track, the Tleilaxu Tanks holding dead pieces, the Spice Bank holding the spice supply, and the six player circles used for storm order.
The game includes 2 Battle Wheels, which must be assembled and joined with the center pin before you play the game.
Place all Spice tokens in the Spice Bank. Shuffle the Spice deck, Storm deck, and Treachery deck and place them face down next to the game board. Played cards will be piled face up next to the decks as discard piles and reshuffled to restock those decks as necessary.
Players now choose factions. Here are a couple of ways for players to choose their factions:
Use the faction cards from the Bene Gesserit Prediction deck to randomly determine which Faction each player will play. Shuffle the cards and deal 1 card to each player.
Each player randomly draws a Round Prediction card from the Bene Gesserit Prediction deck and selects a faction in descending card order, starting with the lowest card.
Players may swap factions with each other, or a faction that wasn't chosen, at this point if they wish.
Dune is widely considered best at 6 players, but below are some recommendations for fewer players:
For a three-player game, recommended factions are Atreides, Harkonnen, and Fremen.
For a two-player game, try Atreides vs Harkonnen, or play 2 factions each (select factions normally as described above). In either case, the number of strongholds needed to win is increased to 4. There are no alliances.
For 4 players, consider leaving out both the Spacing Guild and Bene Gesserit.
For 5 player games try playing without the Bene Gesserit.
Players take their Faction Screens and Faction Sheets and set up their factions as follows:
Randomize seating order. Players place their Faction Marker on the player circle closest to their Faction Screen and seat at the table.
Deal cards from the Treachery deck face down to each player equal to the number indicated by their Faction Sheet.
Remove the cards for all factions that are not in play from the Traitor deck. Shuffle the cards thoroughly and deal each player 4 cards.
Each player then secretly selects 1 card to keep by placing their chosen card face down behind their Faction Screen, returning the other cards face down to the bottom of the Traitor deck. A player may choose a Traitor card matching one of their own leaders, for a guaranteed safe leader.
Give each player spice from the Spice Bank equal to the number indicated by their Faction Sheet. All spice holdings should be kept secret behind Faction Screens.
Place each player's forces on the board as indicated by their Faction Sheet. All remaining forces are placed in their reserves next to their Faction Screen.
Place the Game Round marker at 1 on the Round track, and the Storm marker on Storm Start.
Note: Many faction advantages and card effects contradict the rules. Individual effects and exceptions are not detailed below, and those effects always have precedence over the rules.
Dune is played over the course of up to 10 rounds, each comprising nine specific phases. Each round must be completed in the exact sequence presented below.
Player Turns in a phase are conducted in "storm order" (going counter-clockwise from the First Player).
It is possible for Dune to end after only one round! Players must take care to note player order and which factions have the capability to win when deciding their own actions.
Page 10 The Storm marker moves. The player whose Faction marker the storm next approaches will be the First Player for this round.
Page 11 Turn over the top card of the Spice deck and place the amount of spice shown on the card in the indicated sector of the highlighted territories (unless in a storm sector). If Shai-Hulud appears during the Spice Blow and Nexus phase, a Nexus occurs, giving players the opportunity to make and break Alliances.
Page 12 Players with 0 or 1 spice may claim CHOAM Charity.
Page 12 Players bid spice to acquire Treachery cards.
Page 13 All players are allowed to reclaim forces (and eventually leaders) from the Tleilaxu Tanks in storm order.
Page 14 Starting with the First Player and proceeding in storm order, each player in turn may ship forces to the game board and then may move their forces on the game board.
Page 16 Players must resolve battles in every territory that is occupied by forces from two or more factions. Battles are conducted in storm order.
Page 20 Forces in the sector of a territory containing spice may collect spice.
Page 20 Check to see if any player or Alliance has won the game. If there are no winners, move the Game Round marker to the next position on the Round Track to begin the next round. Players who received bribes in this round may collect that spice at this time.
The Storm marker will be moved a random number of sectors around the board (if any), potentially changing which player will go first in each applicable phase, and blocking sections of the board (including a stronghold on occasion).
During the Storm phase of the first round, place the Storm marker at a random location along the map edge using the following procedure: the two players whose Faction markers are nearest on either side of the Storm Start sector secretly dial a number from 0 to 20 on the Battle Wheels. The two numbers are simultaneously revealed and totaled, and the Storm marker is moved from the Storm Start Sector counter-clockwise around the map the sum total of sectors. There can be no coordination between these two players about where the initial Storm marker will end up being located.
In all subsequent Storm phases, the storm's movement will be determined by drawing a Storm card and advancing the Storm marker from its current position counter-clockwise around the map the sum total of sectors.
The player whose Faction marker the storm next approaches is the First Player in the Bidding phase, Revival phase, Shipment and Movement, and Battle phase. If the storm is directly even with a faction Marker, then that player is last in storm order for any phase that has player turns.
Play proceeds counter-clockwise (or in "storm order") from the First Player.
When a Storm card is drawn, it forms a discard pile, meaning most of the time a different Storm card will be drawn in the next round. However, three of the Storm cards have a "Reshuffle" instruction on them. After the storm has moved, shuffle all of the discarded Storm cards back into the deck.
One Storm card calls for the last two players to handle Battle Wheels to dial the storm (each a distance of 1-3 sectors). That would typically be the two players who fought the last battle in the previous round. If no battles were fought in the previous round, use the two players on either side of the storm's current location (and if it is located exactly at a player's Faction marker, use the two factions on either side of that faction). Unlike the first storm's positioning, players may make deals or bribes about how to dial for this card's effect.
Any forces in a sector of sand territory (except the Imperial Basin while Shield Wall is intact) over which the storm passes or stops are destroyed. Place destroyed forces in the Tleilaxu Tanks. Forces that are not in sand territory find protection from the storm. In addition, any spice in a sector of sand territory over which the storm passes or stops is removed to the Spice Bank.
If Family Atomics is used to destroy the Shield Wall, the storm does not immediately kill forces in Arrakeen, Carthag, or Imperial Basin if located over those territories before moving. Those forces will be lost whenever the storm moves over or ends its movement over those territories.
Forces cannot move into, out of, or through a sector in storm. Forces cannot battle if only one faction's forces are in a sector under storm, or if forces are on opposite sides of the storm. Opposing forces in storm in the same sector of a rock or stronghold territory still battle.
Spice will be added to random territories on the board, but the terrifying sandworms known as Shai-Hulud may appear, destroying any spice and forces in the previous rounds' territories. If Shai-Hulud does appear, factions will have a chance to form or break alliances.
The top card of the Spice deck is revealed.
Note: During the first round's Spice Blow phase only, all non Spice Blows cards revealed are ignored and set aside, then reshuffled back into the Spice deck at the end of this phase.
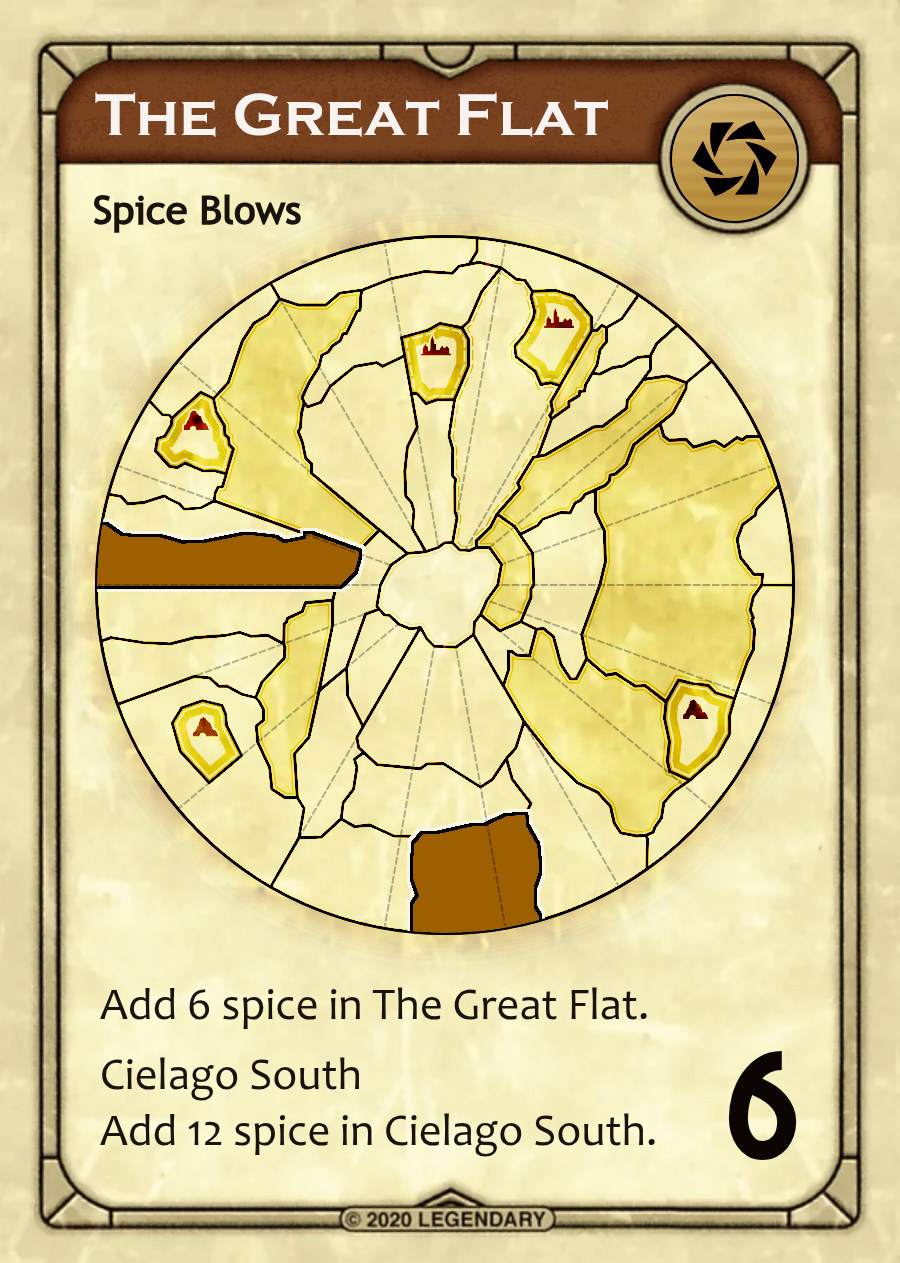
The amount of spice indicated on the card is taken from the Spice Bank and placed onto the two territories in the sectors containing the Spice Blow icon. Place the card face up on the Spice deck discard pile.
If the Spice Blow icon is currently in storm, no spice is placed in that territory.
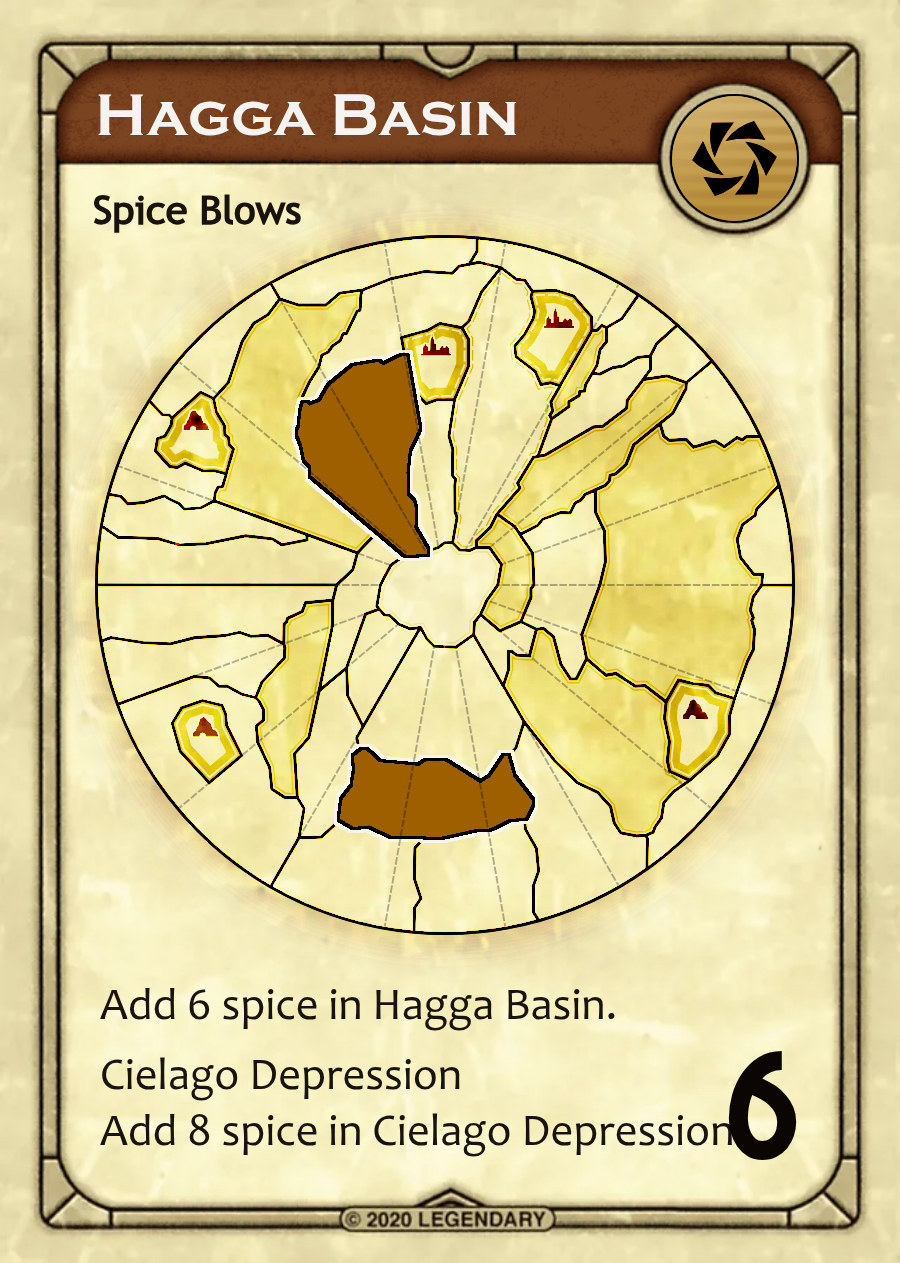
Example: If this card was drawn, players would add 6 Spice in Hagga Basin, and 8 Spice in Cielago Depression, unless either sector with the Spice Blow Icon was in storm
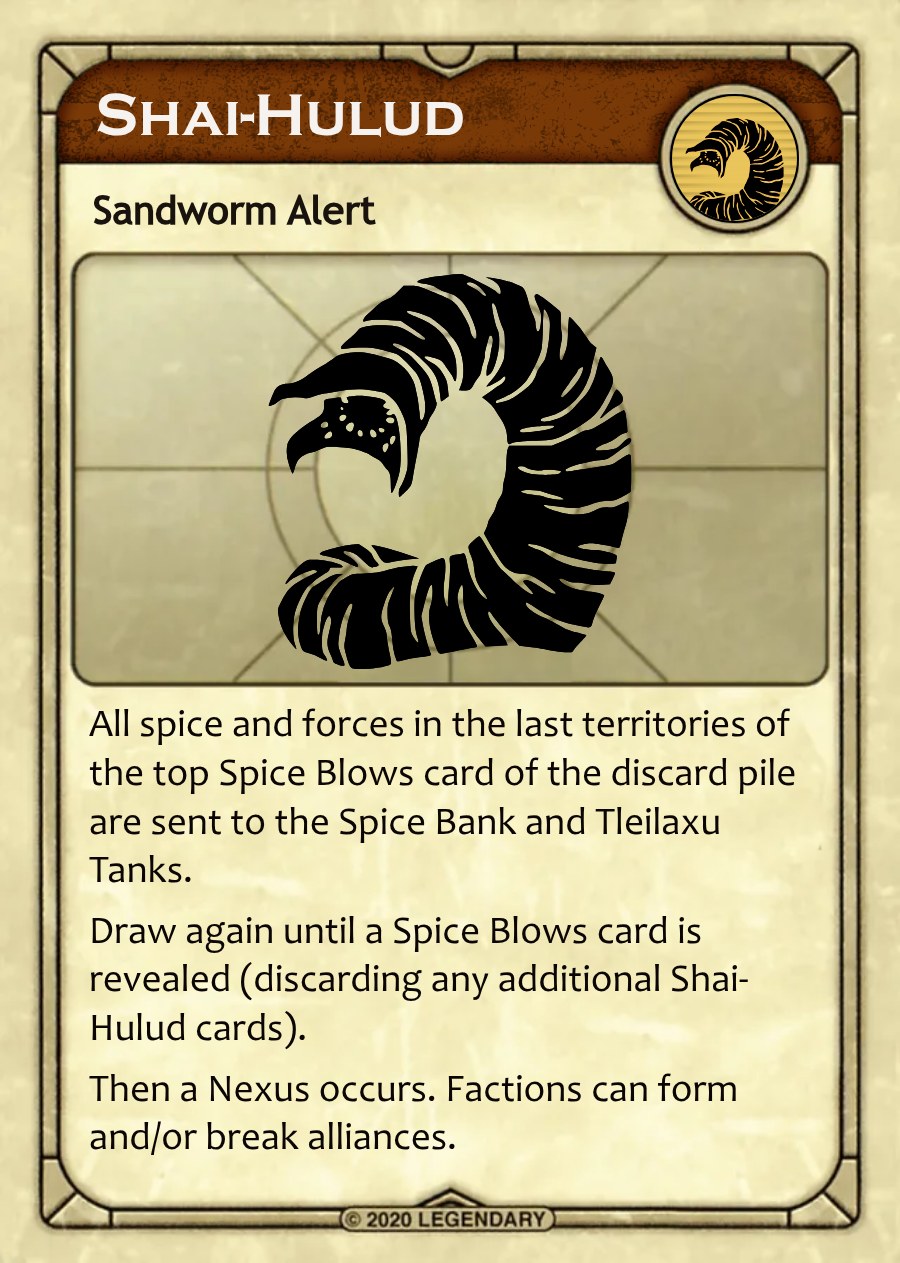
This is a sandworm, attracted to the activity from the previous round's spice blows. A Nexus will occur after the following Wormsign effects:
All spice and forces in the territories determined by the face up card in the Spice deck discard pile are "destroyed" (including Little Maker); removed to the Spice Bank and Tleilaxu Tanks, respectively. Place the Shai-Hulud card face up on the Spice deck discard
pile.
Reveal the top card of the Spice deck. If it is a Shai-Hulud or Little Maker, it is immediately discarded without effect, and another card is revealed. This continues until a Spice Blows card appears and is resolved. The Spice Blows card is then placed face up on the Spice deck discard pile.
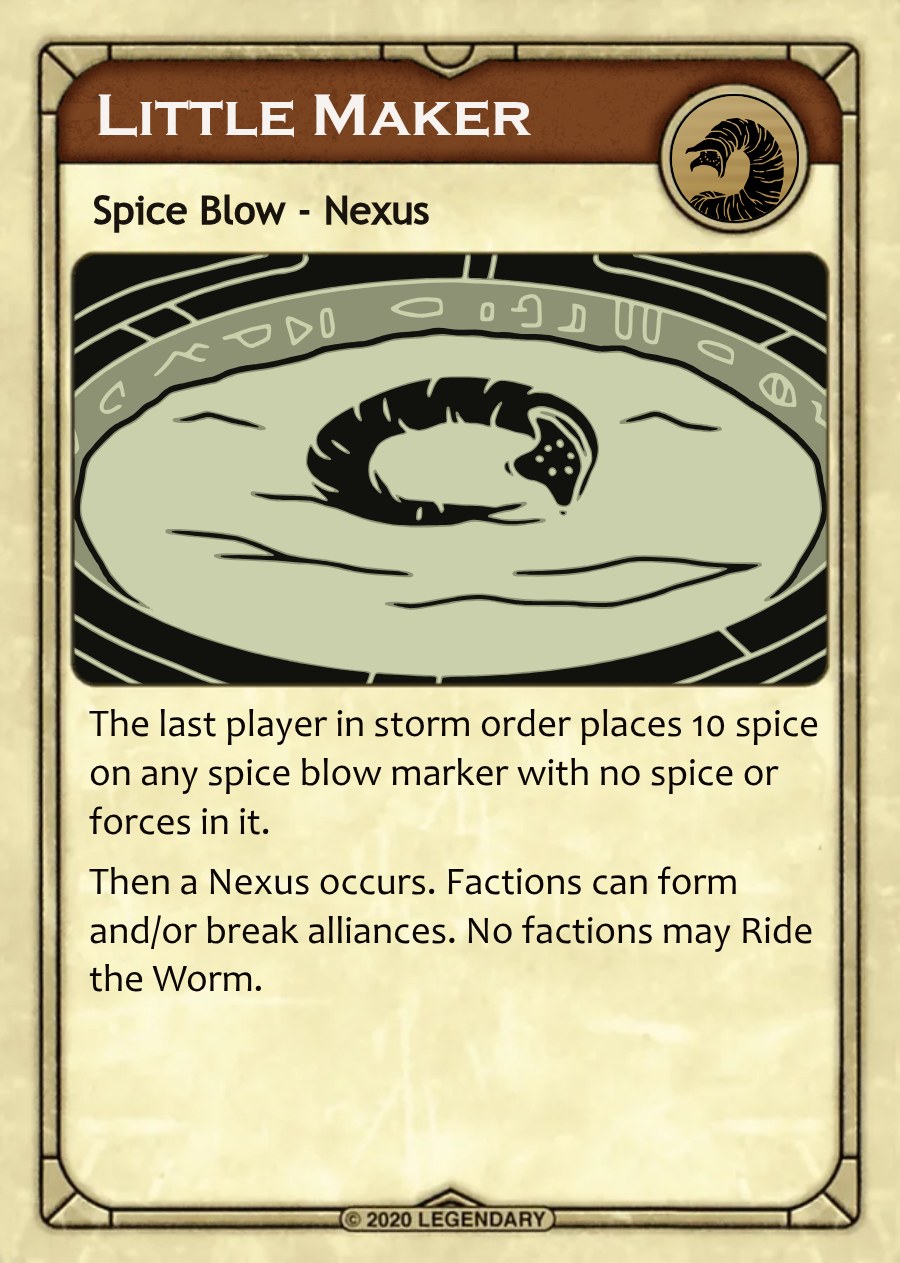
This card is both a single Spice Blow and a Nexus. The last player in storm order places 10 spice on any vacant Spice Blow icon not in storm. Little Maker does not count as a Shai-Hulud for Wormsign (attacking the previous territories) or any other effects that refer to "Shai-Hulud".
Revealing a Shai-Hulud or Little Maker card after the first round also causes a Nexus after spice is added to spice markers. During a Nexus, alliances can be formed and broken (see Alliances on page 21).
This phase provides factions with little or no spice to proceed with the round having at least 2 spice.
Beginning with the First Player and proceeding in storm order, each player with 0 or 1 spice may reveal the spice behind their Faction Screen to collect spice from the Spice Bank to bring their total to 2 by publicly declaring that they are collecting charity, and the amount.
Note: The Bene Gesserit always collect 2 spice from CHOAM Charity, regardless of how much spice they have.
In the Bidding phase, factions will bid spice to acquire Treachery cards, which can be weapons, defenses, actions, or worthless cards.
Before bidding starts, all players declare how many Treachery cards they hold. The hand limit is normally 4.
Deal cards from the Treachery deck face down in a row, 1 card for each player whose hand is not full, up to a maximum of 6 cards to be auctioned. If the deck is ever exhausted, shuffle the discard pile to form a new deck.
Hold an auction for the first card in the row:
The First Player starts the bidding; if the First Player's hand is full, the next player in storm order whose hand is not full opens the bidding.
Players must bid 1 or more spice or pass for the moment. If a player's hand is full, they cannot bid and are automatically passed. After a bid, bidding proceeds in storm order. The next bidder must either raise the bid or pass, and so on around the table until all players but one have consecutively passed. Players may bid on a card they previously passed on as long as it is still up for bid when their turn comes. The top-bidding player pays the number of spice they bid to the Spice Bank and takes the card.
If a player with a full hand plays a card during the Bidding phase (e.g., Truthtrance), they are allowed to participate in bidding normally, but another card is not added to the auction.
Players cannot bid more spice than they have (unless their ally is guaranteeing their bid), even if they hold the Solaris Treachery card.
In subsequent bidding during this phase, the first player who can bid, to the right of the player who opened the bid for the previous card, begins the bidding for the next card. In this way, every player who can bid typically gets a chance to open the bidding for a Treachery card.
Continue bidding for Treachery cards until all cards available for bid have been auctioned off or a card receives no bids by anyone. If everyone passes on a card, return all remaining cards to the top of the Treachery deck in their original order, ending the Bidding phase.
If there are not enough cards in the Treachery deck to fill out the auction, deal out however many remain as described above. Then shuffle the discard pile to form a new deck and continue drawing until that round's auction quota has been reached.
The number (not the type) of Treachery cards each player holds must always be open to everyone during the Bidding phase.
Each player must bid within 10 seconds of the previous player or they are assumed to have passed.
Players will be able to regain lost forces and eventually lost leaders.
Starting with the First Player and proceeding in storm order, all players may revive up to 3 forces from the Tleilaxu Tanks:
Free: Players may revive the number of forces indicated on their Faction Sheets for free.
By Spice: Additional forces may be revived at a cost of 2 spice per force (to the normal limit of 3 forces in total). All spice expended for force revival is placed in the Spice Bank.
Limit: A player cannot revive more than 3 forces in this phase (including free revivals).
To Reserves: Revived forces are placed in reserves.
Initially, factions are not permitted to revive dead leaders. Once all of a faction's leaders are in the Tleilaxu Tanks and/or are currently captured, a player may then revive one of their leaders per round. When this has been triggered, a faction places their second Faction token in the Tleilaxu Tanks as a reminder that they may now revive leaders.
To revive a leader, a player must pay that leader's fighting strength in spice to the Spice Bank.
A revived leader can be played normally and is still subject to being a traitor.
When factions are able to revive leaders, there is no restriction on which leader they revive each round, including a leader they revived in a previous round.
You have limited prescience.
Any time during the Shipping and Movement phase, you may look at the top card of the Spice deck.
During the Bidding phase, you may look at each Treachery card as it comes up for auction before any faction bids on it. You, and only you, may keep written records about Treachery cards.
During the Battle phase, you may force your opponent to reveal to you your choice of one of the four elements they will use in their Battle Plan: the leader (disc or Cheap Hero), Treachery card in the Weapon slot, Treachery card in the Defense slot, or number of force strength dialed plus spice strength. An opponent revealing that they are not playing the particular element asked (e.g. no leader, an empty slot or zero strength) does not allow you to then demand to see another element instead.
Vulnerable to Karama: Karama can be played to cancel this effect immediately after you have named what you are using Battle Prescience to see.
The Kwisatz Haderach token starts out inactive. Use the Kwisatz Haderach card and counter token to publicly keep track of force losses. Immediately after you have lost 7 or more forces in battle (even from a Traitor call), the Kwisatz Haderach token becomes active for the rest of the game and may be added to your Battle Plan (along with a leader) in one territory per round; used as follows:
- Add +2 strength to your Battle Total if the leader or Cheap Hero is not killed.
- A leader accompanied by the Kwisatz Haderach cannot be called as a Traitor.
- The Kwisatz Haderach can only be killed if blown up by a Lasgun/Shield explosion. If killed, the Kwisatz Haderach may be your 1 leader revival during the Revival phase (even if you have not yet triggered leader revival) for 2 spice.
- The Kwisatz Haderach does not need to die for you to be able to revive your other leaders and can be revived before all your other leaders have died.
You may force your ally's opponent to reveal one element of their Battle Plan to you and your ally, following the rules of your Battle Prescience advantage, subject to Karama.
The following one-time ability is triggered by playing a Karama card:
Look at any one player's entire Battle Plan (not just your opponent). This cannot be canceled by Karama.
Spirit World Variant: Family Atomics.
Free Force Revivals are shown here on your faction sheet.
House Atreides can revive 2 forces for free each turn. They can revive an additional force for 2 spice, for a total of 3 forces for the round.
Each player is given an opportunity to bring reserve forces onto the board, and then a chance to move one set of their forces to another territory.
The First Player conducts their Force Shipment, followed by their Force Movement. Play then proceeds in storm order until all players have completed this phase. Shipment actions and Movement actions are always optional, but must be executed in that order:
Players may make one Force Shipment of any number of forces from reserves to any one sector of any one territory on the map.
Players must pay spice to the Spice Bank for their Force Shipment. The cost of shipping is 1 spice per force shipped into any stronghold or 2 spice per force shipped into any other territory.
Storm: Players cannot ship anywhere into a sector in storm.
Strongholds: Players cannot ship into a stronghold already occupied by two other factions.
One Way: Players cannot ship forces from the board back to reserves, or cross-ship from a territory on Dune to another territory on Dune.
After a Shipment action, if any, a player may then make one Force Movement action. For their Force Movement they may move, as a group, any number of their forces from one sector of a territory to any one sector of any adjacent territory (or to a different sector within the same territory). Forces are free to move into, out of, or through any territory occupied by any number of other Faction's forces with certain restrictions and additional movement advantages mentioned below.
Players may not drop off or pick up forces along the way as part of their Movement.
At the start of their Force Movement, factions with forces in Arrakeen, Carthag, or both have access to Ornithopters.
Ornithopters provide a faction the ability to move a group of their forces up to three adjacent territories. The forces moved do not have to be in Arrakeen or Carthag to make a three-territory move. For example, a player with one or more forces in Arrakeen would be able to move forces starting in Tuek’s Sietch through Pasty Mesa and Shield Wall to the Imperial Basin.
Sectors have no effect on movement distance. Forces can move into any sector when moving into or through a territory. However, moving forces to a different sector in the same territory is not free and can only be done as part of your normal Force Movement action.
As described in the Storm phase, no force may move into, out of, or through a sector in storm. Many territories span several sectors, allowing movement into and out of a territory that is partly in storm, so long as the move does not pass through the sector in storm.
When ending a move in a territory lying in several sectors, a player must make clear in which sector of the territory they choose to leave their forces.
Polar Sink is never in storm.
As with Force Shipment, forces cannot be moved into or through a stronghold if forces of two other players are already there.
Factions may not voluntarily end their actions in the same territory as their ally, but may move through the territory. See Constraint on page 21.
There are very rare cases when more than two factions can end up in a stronghold when none are allied. When this happens, and they have no opportunity to move out, the territory is treated like a non-stronghold territory in the Battle phase.
The Polar Sink is a free haven for everyone. Any number of factions may have forces there, and they do not battle in the battle phase.
Example: House Harkonnen has 4 forces in Carthag. During Force Shipment they ship another 5 forces there.
For their Force Movement, House Harkonnen moves 3 of their forces into Arrakeen, leaving 6 forces in Carthag.
Example: On their turn, the Spacing Guild makes a Force Shipment of 1 force into Arrakeen to gain access to Ornithopters.
With so many House Atreides forces in Arrakeen, it would have been safer to ship forces into Carthag where there is only 1 Bene Gesserit force, however they can't ship forces into a sector in storm.
With access to ornithopters now, the Spacing Guild makes a Force Movement, moving forces from Tuek's Seitch to Cielago South in order to harvest the spice there.
Players in the same territory must battle until no territories are co-occupied.
Wherever two or more players' forces occupy the same territory, battles must occur between those players. Even forces in a different sector of the same territory are considered part of that battle (unless separated by the storm). Battles continue until only one player's forces (or no forces) remain in each territory on the map with two exceptions:
Players cannot battle one another in a territory if only one player's forces are in storm or if forces are on opposite sides of the storm. Their forces remain in the same territory at the end of the phase. Forces in storm in the same sector of a rock or stronghold territory still battle.
Players cannot battle in Polar Sink. It is a free haven for everyone, and any number of factions may have forces there. Note that if a token is in Polar Sink, creating a "territory within a territory" (e.g., the Ixians' Hidden Mobile Stronghold), forces must battle in that territory within Polar Sink.
When resolving battles, the First Player has "Initiative" until all of their battles, if any, have been fought. The player with Initiative chooses the order in which they wish to fight their battles. They may even choose a battle in a non-stronghold territory where they must fight two or more rivals, then choose a different territory before returning to the original territory to battle other rivals there.
Then the player to their immediate right gains Initiative and so on, following storm order, until all battles are resolved.
If three or more players are in the same territory, the player with Initiative picks who they will battle first, second, etc. for as long as they have forces in the territory.
To resolve a battle, each player secretly formulates a Battle Plan. A Battle Plan always includes the amount of force strength dialed on the Battle Wheel. If possible, it must include a Leader disc or a Cheap Hero Treachery card. Additionally, it may include Treachery cards at the player's discretion.
Each player in the battle takes a Battle Wheel and secretly dials a number from zero to the amount of force strength they have in the disputed territory. This is typically the number of forces a player has there (but with double-strength special forces, it is their value- see below). Regardless of the battle's outcome, they will lose at least the amount of force strength dialed on the Battle Wheel. A faction will lose all of their forces in the territory if they lose the battle.
Example: Atreides have 4 forces in a battle. They can dial any number from 0-4. If they win the battle, they will lose the strength they dialed (in their case, the number of forces lost will be the number they dialed). If they lose, they will lose all of their forces.
One Leader disc is secretly chosen and placed face up in the slot on the Battle Wheel. Players may play a Cheap Hero Treachery card in lieu of a Leader disc.
Leaders that survive battles may be played in further battles in the same territory, but no leader may fight in more than one territory during the same phase (except when a traitor is called - see below).
If possible, a player must always play a Leader disc as part of their Battle Plan if they have one available unless playing a Cheap Hero.
If a player cannot play a leader (including a Cheap Hero) they do not need to announce so prior to revealing Battle Plans.
A player who is unable to include a leader or unwilling to include a Cheap Hero must still battle, but they cannot play any Treachery cards as part of their Battle Plan. This situation can occur when all their leaders are in the Tleilaxu Tanks, captured, or have fought in other territories during that phase.
A Cheap Hero contributes 0 fighting strength to a battle; however, it allows a player to retain the option of playing Treachery cards in their Battle Plan.
Players with a leader or Cheap Hero may play one Weapon Treachery card in their "Weapon Slot", one Defense Treachery card in their "Defense Slot", both, or neither, by holding any played cards against their Battle Wheel. The number of cards a player wishes to have in their Battle Plan is secret until the Battle Plan is revealed. The death of a Leader disc or Cheap Hero does not negate any accompanying Treachery cards in a player's Battle Plan.
A player may choose to play a Worthless card in lieu of a weapon or defense (or both) in the corresponding Slot. There are expansion cards that can be played in a Weapon or Defense Slot, and in these cases, they also replace a weapon or defense, but do not count as one.
Note that a Cheap Hero is not played to a Weapon or Defense Slot, but is instead played in place of a Leader disc. This is the only way three Treachery cards can be in a Battle Plan.
Note: When forming your Battle Plan, hide as much information behind your Battle Wheel as possible, so your opponent doesn't know how many cards (if any) you are playing.
Spice strength represents training, equipment, and/or troop payment. Each faction may spend spice to the Spice Bank to add strength to their overall Battle Plan.
When dialing at least 2 force strength, spend 2 spice to add +1 spice strength to their total
When dialing at least 4 force strength, spend 4 spice to add +2 spice strength
When dialing at least 8 force strength, spend 8 spice to add +3 spice strength
Example: House Atreides are in a battle and have dialed 6 force strength. They choose to spend 4 spice for +2 spice strength.
The amount of spice (and whether any is being added) is secret until the Battle Plan is revealed. Dialed strength is not number of force tokens, but dialed strength (i.e., 1 Sardaukar is 2 strength, which allows for a +1 by spending 2 spice).
Spice spent is not cumulative (i.e., you cannot spend 10 spice for a +4 when dialing 8).
Players use the indicator on their Battle Wheels to commit their spice. A faction must have the spice on hand in order to add it to their strength. It cannot be paid for them by their ally, nor come out of spice gained for the death of a leader.
When both players are ready, Battle Plans are revealed simultaneously, and pay spice for Spice Strength to the Spice Bank.
The winner is the player with the highest Battle Total.
Battle Total is determined by totaling the force number dialed on the Battle Wheel, a surviving leader's strength, and any additional points from spending spice for spice strength.
In the case of a tie, the player with Initiative wins.
If one player played a Weapon Treachery card and the opposing player did not play the corresponding Defense Treachery card, then the opposing player's leader is killed, and their strength does not count toward the Battle Total. Both leaders can be killed and neither will count in the battle.
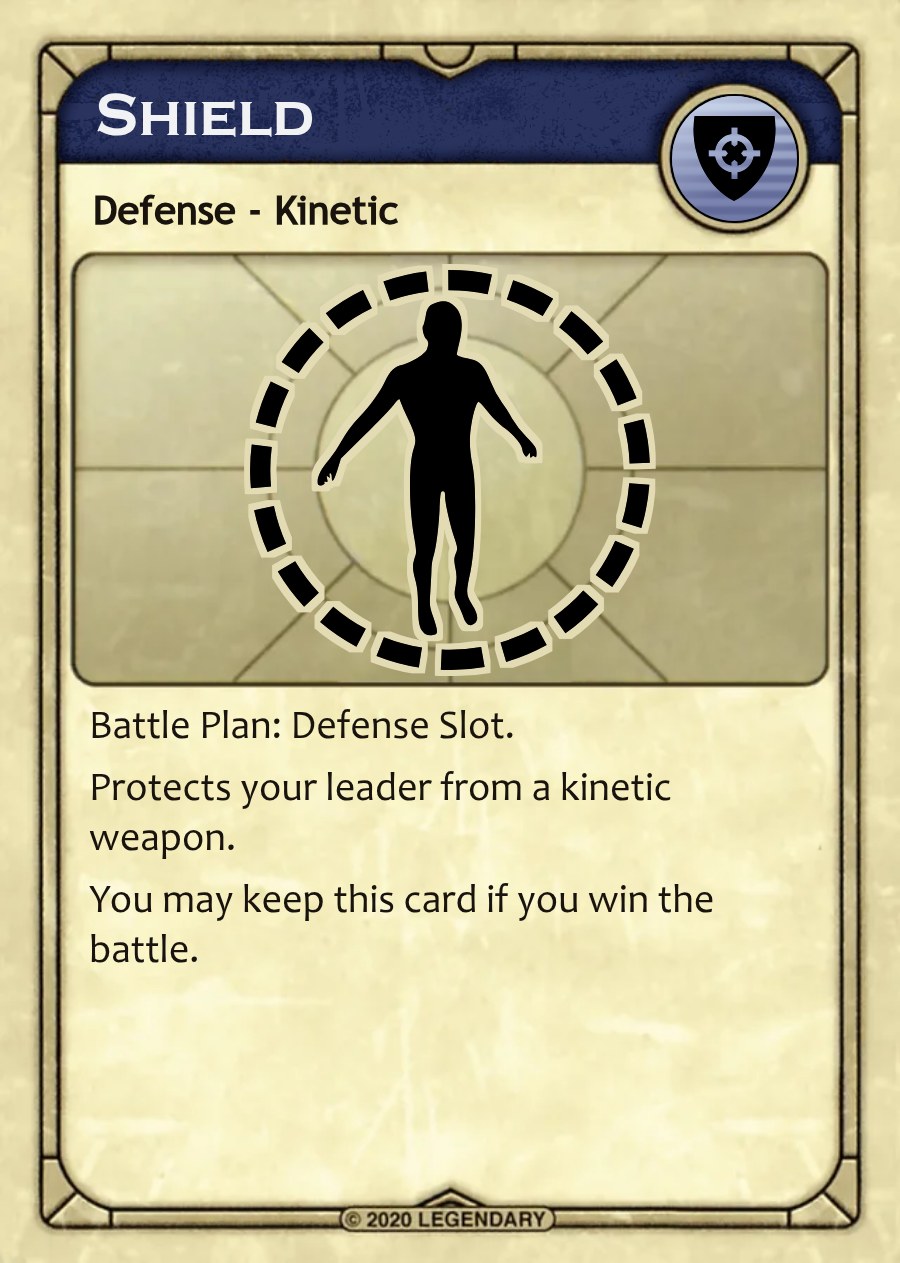
Kinetic defense protects a leader from a kinetic weapon.
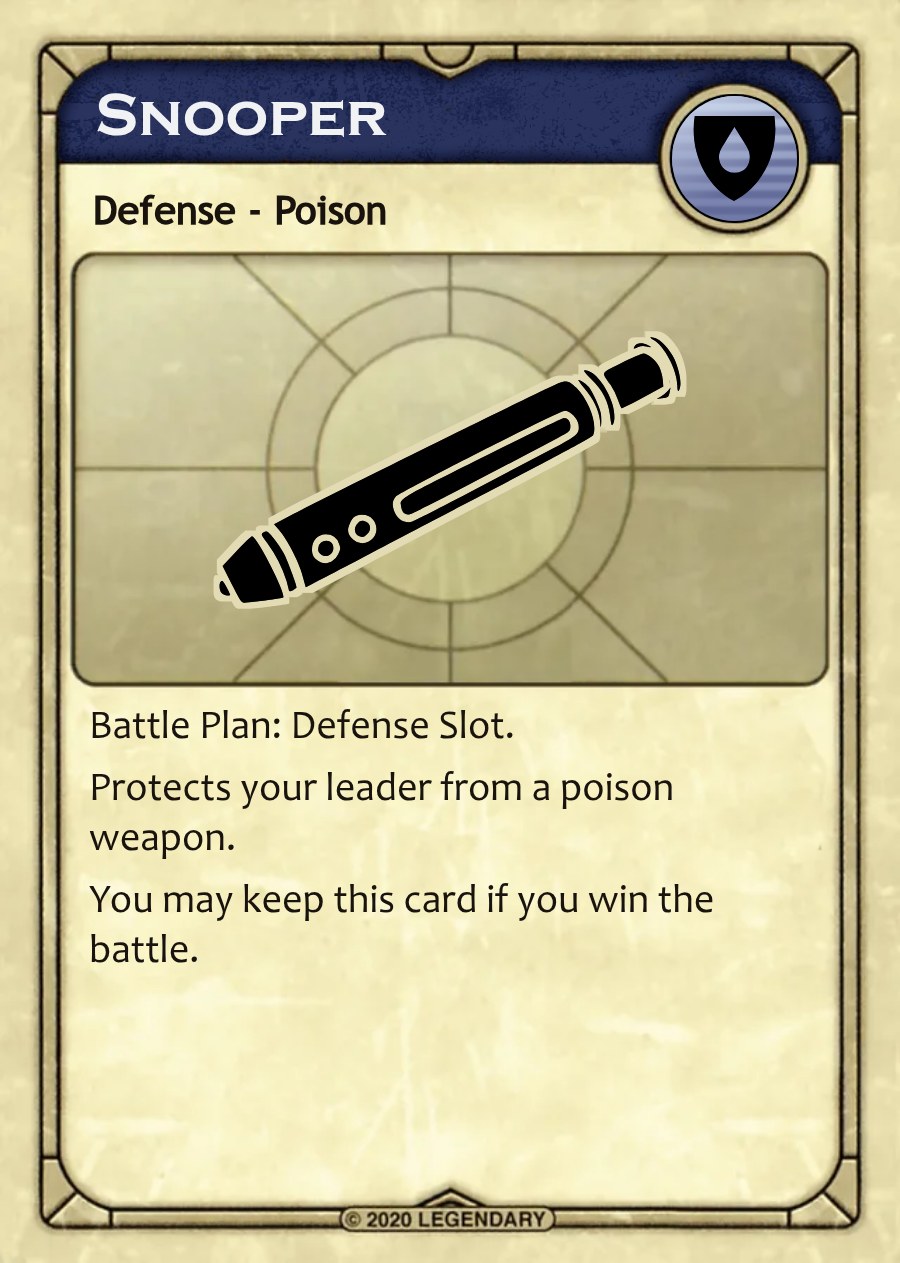
Poison defense protects a leader from a poison weapon.
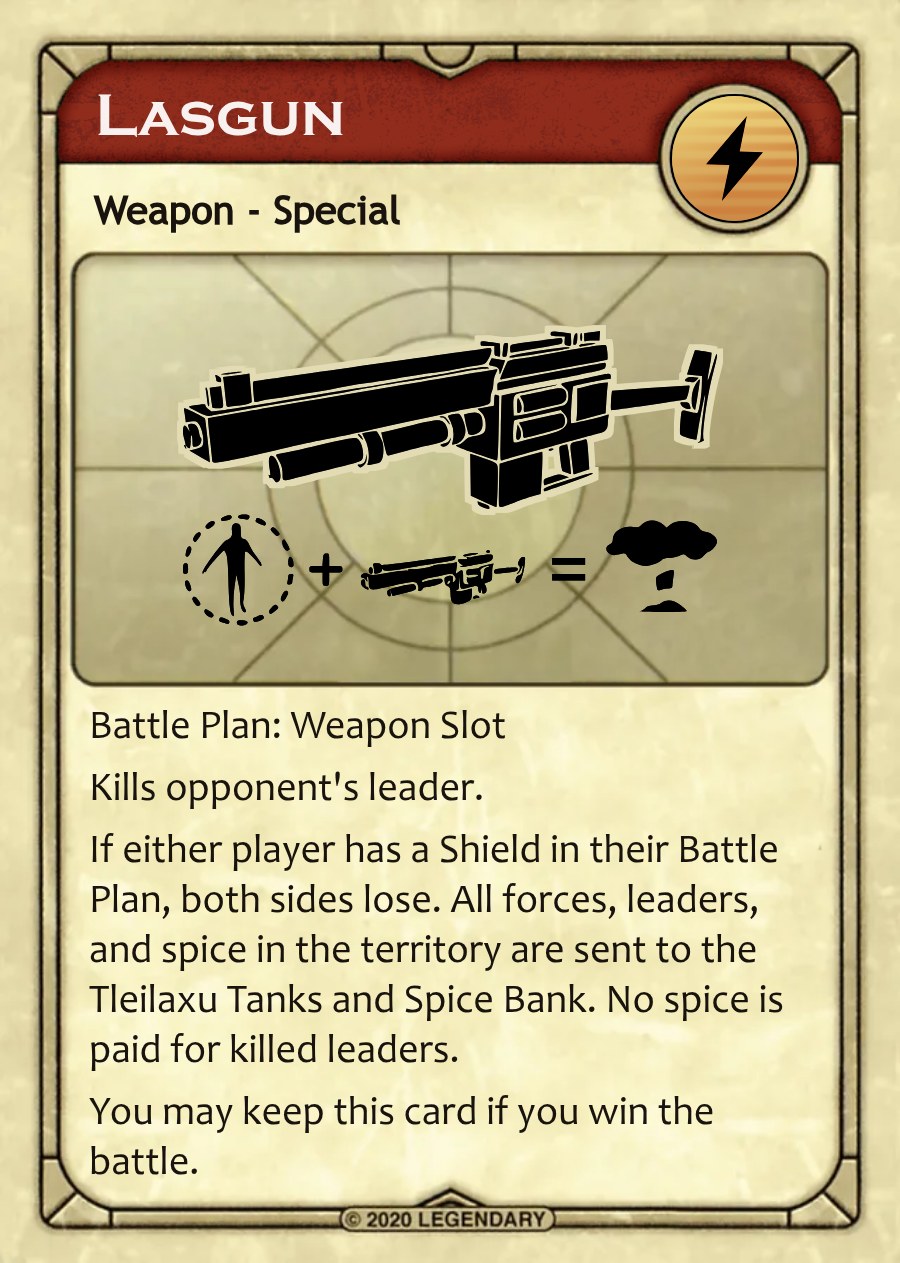
There is no defense against the Lasgun.
If a player has a Lasgun in their Battle Plan, and either player has a Shield in their Battle Plan, it causes an atomic explosion that kills all forces and leaders in the territory. Additionally, all spice in the territory is returned to the Spice Bank. Any face up leaders in the same territory that survived previous battles there are also killed. Both players in that battle count as having lost the battle (see below). Note that other forms of kinetic defense (e.g., Weirding Way) do not cause an atomic explosion.
6 force strength + 2 spice strength (4 spice), with a strength-3 leader.
Comparison without spice: the same 6 force strength and strength-3 leader, with no spice strength.
Killed leaders are immediately placed face up in the Tleilaxu Tanks. The winner of the battle immediately receives spice from the Spice Bank equal to the total fighting strength of all leaders killed in the battle (including their own leader, if killed).
Surviving leaders are placed face up in the territory where they were used until all battles in other territories have been resolved. Note that these leaders may be used again in any battles in that same territory. If a player picks up a leader for a subsequent battle in that territory, they need not use that same initial leader in battle, but must set all leaders used in that territory face up after the battle (if surviving). At the end of the phase, they are retrieved by their owners.
The losing player loses all of their forces in the territory to the Tleilaxu Tanks and must discard every Treachery card they used in their Battle Plan.
Note that the loser does not automatically lose their leader as a result of the battle's outcome; leaders are killed only by Weapon Treachery cards without the proper defenses. Even if the losing player successfully killed the winning player's leader, they do not collect spice.
The winning player loses only the number of forces equal to the strength they dialed on their Battle Wheel (one can still win a battle even if they full-dial and lose all of their forces). These forces are placed in the Tleilaxu Tanks. If the Treachery card text allows, the winning player may keep or discard any of the cards they played. These cards may be used in a subsequent battle, even in the same round, and even in different territories.
If a winning faction has "double-strength" special forces in a battle, they may use them to absorb losses based on their number dialed.
For example, the Emperor has dialed 3 in a battle where they have three normal forces and three double-strength Sardaukar forces. They may choose to lose all three normal forces, or they may choose to lose one Sardaukar and one standard force (equaling a total strength of 3 for what they dialed).
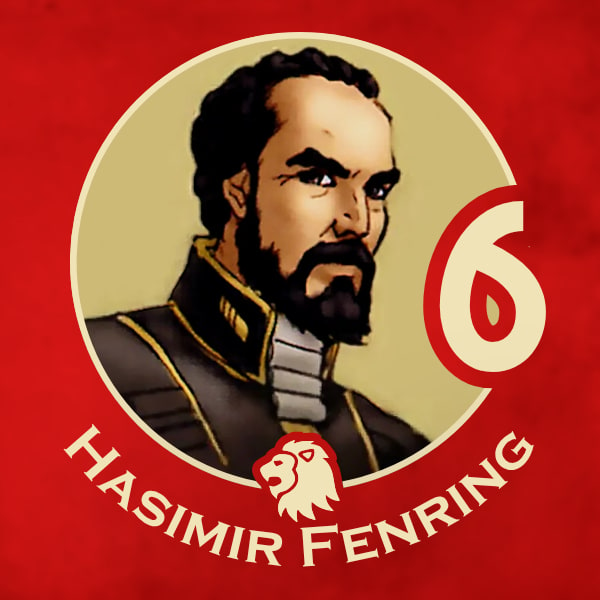
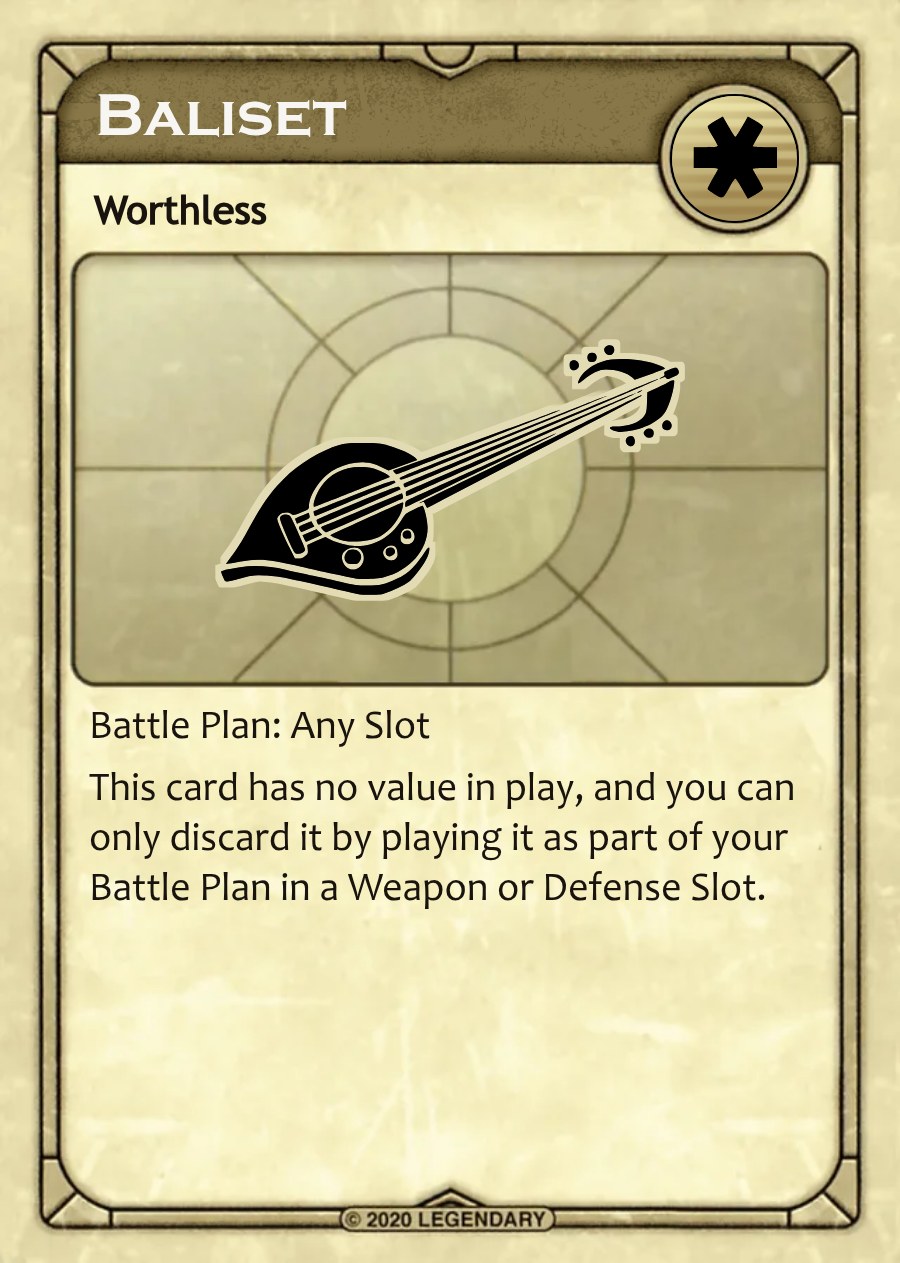
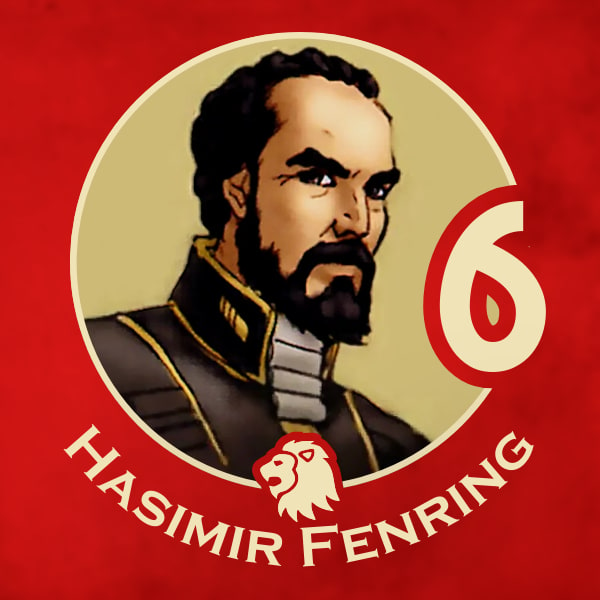
The Emperor is in a battle with House Atreides. They dial 6 force strength and pay 4 spice to add +2 spice strength. They play Hasimir Fenring who is a 6 strength leader. This gives them a battle total of 14 strength. The Emperor plays a Snooper poison defense and a Baliset to complete their battle plan
If a player is in a battle and their opponent uses a leader that matches a Traitor card they control, they may call out "Traitor!" to win the battle, though they are not required to do so. This is true even if a leader matching your Traitor card is controlled by another faction (e.g., when captured by Harkonnen, or a Ghola).
When a traitor is called, the player who revealed the Traitor card:
Immediately wins the battle.
Loses nothing, regardless of what was played in the Battle Plans (even if a Lasgun and Shield are revealed) - they may discard any or all Treachery cards from their Battle Plan.
Places the traitorous leader disc in the Tleilaxu Tanks, and receives that leader's strength in spice from the Spice Bank.
May use their Leader in a different battle (even in a different territory) that round.
Keeps any spice they committed for spice strength.
The player whose traitor was revealed:
Loses all of their forces in the territory to the Tleilaxu Tanks.
Discards all of the Treachery cards they played.
Discards any spice they committed for spice strength.
Example: Fremen are battling the Emperor, and are poised to win 13 to 11. But the Fremen have used Chani as the leader in the battle, and the Emperor holds the corresponding Traitor card, calling out "traitor!" Now the Emperor wins, losing none of his dialed forces. Fremen lose all of their forces, as well as Treachery cards played. Chani goes to the Tleilaxu Tanks, and the Emperor player gains 6 spice for her.
If both players reveal a Traitor card, both players lose the battle, all of their forces in the territory, Treachery cards played, spice committed, and their leaders.
Neither player gets any spice for killed leaders.
A dead traitor may be revived normally, but is still considered a traitor if used against the same faction holding the corresponding Traitor card.
If a leader is captured and is used in a battle against the faction they were originally part of, they can be called a traitor if the opposing player has that Traitor card.
Example: The Harkonnen player captures Lady Jessica, and opts to use her in a subsequent battle against Atreides. The Atreides player chose the Lady Jessica Traitor card during setup as a safe leader instead of picking a traitor. Atreides may reveal the Lady Jessica Traitor card after Battle Plans are revealed to win that battle as described above.
House Atreides dials 4 force strength and chooses not to pay any spice for spice strength. They play Lady Jessica as their leader. This gives them a battle total of 9 strength. House Atreides plays a Maula Pistol as their weapon, and no defense card.
❌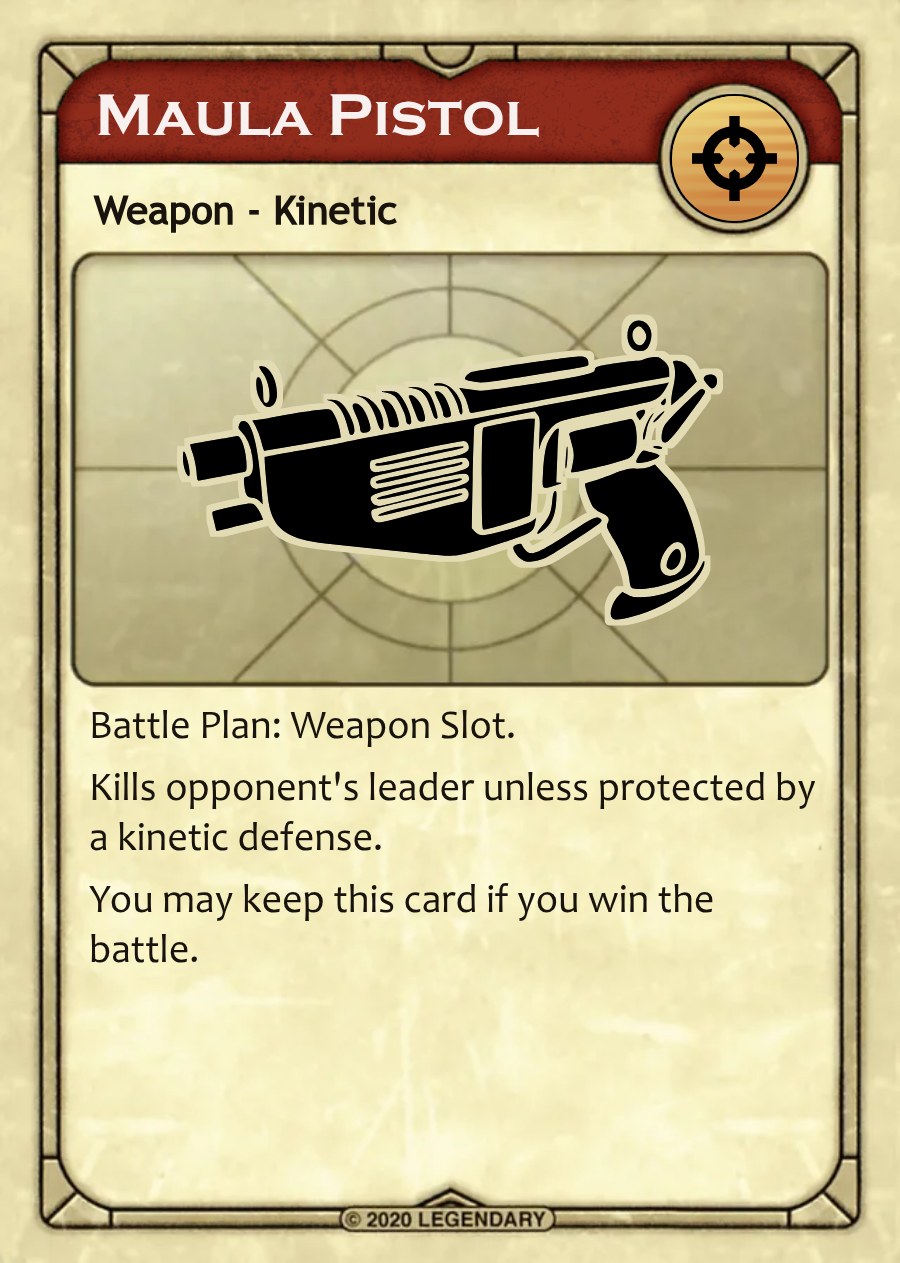

When Battle Plans are revealed, House Atreides kills Count Fenring with the Maula Pistol. This reduces the Emperor's battle total to 8 (6 for their dial plus 2 for spice strength).
House Atreides wins the battle with a battle total of 9. They lose 4 forces from the territory that the battle took place in, gain 6 spice from the spice bank for killing Hasimir Fenring, and get to keep their Maula Pistol.
The Emperor loses all of their forces, Hasimir Fenring is sent to the Tleilaxu Tanks, and the Treachery cards are discarded.
Forces in desert territories containing spice can harvest it, and those players occupying certain strongholds gain additional spice.
If a player has forces in the sector of a sand territory with a spice marker containing spice they may now collect spice there. This is done by taking 2 spice per force they have in the territory (up to the amount of spice there).
If a player occupies Carthag or Arrakeen, they have access to Carryalls, and their collection rate is 3 spice per force in all territories where they are collecting spice. Uncollected spice remains where it is for future rounds, and forces collecting spice remain in the territory.
If a player controls Arrakeen or Carthag, they gain 2 spice from the Spice Bank. A player controlling Tuek’s Sietch gains 1 spice from the Spice Bank. A player controlling more than one of these strongholds will collect for each one they control.
Carryalls and 2 spice stronghold income.
1 spice stronghold income.
Carryalls and 2 spice stronghold income.
Players check for victory conditions, collect bribes, and perform any specified actions.
If an unallied player occupies 3 strongholds with at least one of their forces, that player wins the game. If an Alliance occupies a total of at least 4 strongholds with one or more forces, that Alliance wins the game.
For example, if House Atreides are in an Alliance with the Fremen, and the Fremen occupy Sietch Tabr and Carthag and House Atreides occupy Tuek's Sietch and Arrakeen during the Mentat Pause phase, they win the game together.
If there are no winners, move the game round counter to the next position on the Round Track to begin the next round.
Any players who were bribed that round collect their spice in the Mentat Pause phase, placing it behind their Faction Screens. Players may not make any bribes during this phase. No Treachery cards may be played in this phase.
With variants and expansion factions, it is possible for multiple win conditions to be met, so the following hierarchy determines the winner; with ties broken by most strongholds, most forces in strongholds, and then most spice. Factions with Special Victory Conditions have their own timing and criteria that are applied as indicated.
Faction not in an alliance controls 3+ strongholds
Faction not in an alliance controls 2 strongholds and 3+ Tech tokens
Alliance controls 5+ strongholds
Alliance controls 4 strongholds and 3+ Tech tokens
Alliance controls 4 strongholds
Alliance controls 3 strongholds and 3+ Tech tokens
(For purposes of Tournaments, the player in an alliance with more strongholds is ranked higher, with the number of forces in strongholds as a tiebreaker; followed by most spice).
A Nexus occurs in the Spice Blow and Nexus phase when a Shai-Hulud card is revealed after the first round. During a Nexus, all players have a chance to make and/or break Alliances. Once players have had a chance to do so, play continues.
No more than two players may be in an Alliance. The win condition for Alliances is 4 strongholds between the two players, in any combination.
For up to two minutes, players may discuss among themselves the advantages and disadvantages of allying and with whom. Private discussions are allowed, though it must always be publicly known that players are having discussions.
Two minute limitations are a guideline to aid the flow of the game, so players should use their best discretion.
The members of an Alliance must be revealed to all. Alliances cannot be secret. Swap Alliance cards as a reminder of who is in an Alliance with whom.
Several Alliances can be formed during a Nexus, but no player can be a member of more than one Alliance. Once all players have had a chance to ally, no further Alliances can be made or broken until the next Nexus.
Any player may break an Alliance during a Nexus by announcing that they are breaking from an Alliance.
Players who break from an Alliance have an opportunity to immediately form a new Alliance.
If an Alliance occupies a total of at least 4 strongholds with one or more forces during the Mentat Pause phase, that Alliance wins the game. It doesn’t matter what the ratio of strongholds is between the allied players (one player can be in one stronghold, with the other in three, or one player can be in four, while their ally is in none).
Players cannot end an action (e.g., a Movement action) or phase having their forces in any territory in which their ally already has one or more forces (except Polar Sink).
Note: If for any reason two factions who become allies occupy the same territory, the first faction to have a Movement action must move out of that territory during the Shipment and Movement phase. If the first faction with an opportunity to ship and move is unable to move out of the territory, they must return those forces to their reserves at the end of their turn. If somehow both factions are unable to move out by the time the phase ends, they both return all of their forces in that territory to their reserves.
Allies may discuss and share strategy and information secretly at any time. However, it must be made public when they wish to communicate in such a way (leaving the room, sharing notes, text messages, etc.).
During the Bidding phase, allies may help each other by paying some or all of the cost of each other’s Treachery cards. To do so, they pay the necessary balance to the Spice Bank (by either paying the full amount, or whatever amount is left after what their ally was willing or able to pay). Players cannot bid more than the total of the spice they have, plus the spice that their ally is willing to contribute to help pay for a card. If a player agrees to let their ally bid higher, they are committed to spending the spice if their ally wins the bid, or guaranteeing the bid.
During the Shipment and Movement phase, allies may pay for each other's shipments. To do so, they pay the necessary balance (by either paying the full amount, or whatever amount is left after what their ally was willing or able to pay).
Allies may assist one another as specified on their Faction Sheets and Alliance cards.
Players are never required to keep their cards, spice holdings, available leaders, or the traitors they selected secret. They also are not obligated to reveal this information either (except as part of a deal - see below).
All spice holdings should be kept behind the Faction Screen. The number of Treachery cards held must be kept open during the Bidding phase, but can be kept secret at all other times.
Other player elements are public knowledge, including number of available forces in reserves, and how many special forces are in a territory. Any time a player wishes to secretly share information, it must be made public that this information exchange is taking place.
Players can make any kind of verbal deals or bribes between one another unless allied. Once negotiated, the terms of these deals and bribes must be stated aloud, and must be honored. A player cannot renege on a deal or bribe, and deals are not required to include a spice bribe. If part of a deal becomes impossible to honor, then that part of the deal is void. All parties of a deal may agree to nullify the deal at any time. While players in an alliance can make deals, they are not binding and cannot involve the transfer of spice between them, but they can include normal legal payments (e.g., paying for an ally's Treachery card in the Bidding phase).
A deal or bribe cannot involve the transfer or gift of Treachery cards, leaders, forces, tokens, or faction advantages (unless specifically indicated). This leaves secret information, stronghold blocking, future actions, and, of course, spice.
Spice transferred as part of a deal or bribe is placed in front of the recipient's Faction Screen, by their Faction marker. Players may collect spice from in front of their Faction Screens and add it to their normal spice only at the start of each round's Mentat Pause phase. Bribes may never be made during the Mentat Pause.
A player cannot make a deal or bribe that would contravene the rules or the player's faction advantages. These are the only limitations.
Each player's Faction Sheet outlines the unique advantages they may leverage throughout the game. If an advantage uses the word "may", it is optional. Refer to the Faction section (page 27) for specific details about each faction.
Factions may agree on a thrown battle. When both parties agree, the following is typically true for both players:
Each player may play a Leader disc face up.
No forces are dialed (unless a faction must dial to exceed their opponent's leader strength).
No player will call Traitor or use faction advantages such as Capture Leader (or expansion effects like reveal a Face Dancer, Execute a leader, conduct an audit).
No weapons or defenses are included in Battle Plans.
Worthless cards may be played and discarded.
Tech token transfer is optional (if using this variant).
However, players can agree to suspend any or all elements of a "thrown battle" over which they have control (e.g., killing a leader, playing a Worthless card, etc.), or add other terms.
Information in Dune is a valuable resource, and it can be offered in deals (including as bribes).
For example, Atreides gains Treachery card knowledge during the Bidding phase, and they can solicit bribes to share that information to some or all of the other players. It is allowable for Atreides to simply show the actual card up for bid to any player, whether as part of a deal or for any reason.
Another example: House Harkonnen keeps all the Traitor Cards they draw. The Harkonnen player may sell some or all of that information to another player, providing possible safe leaders to play.
Dune at its best is highly social. Players are encouraged to threaten, intimidate, bargain, and bluff about every aspect of gameplay. Reason with the other players to do or not do particular actions, whether it's self-serving or mutually beneficial.
For example, "I won't attack you in Hagga Basin if you bribe half of that spice when you harvest it".
Players are not permitted to keep notes, other than Atreides' advantage for Bidding. The contents of discard piles are not public information, and no discard pile may be searched unless an effect allows a player to do so.
The Treachery deck contains Weapons, Defenses, Actions, and Worthless cards. Other than the card(s) a player starts with, generally the only way to gain them is in the Bidding phase.
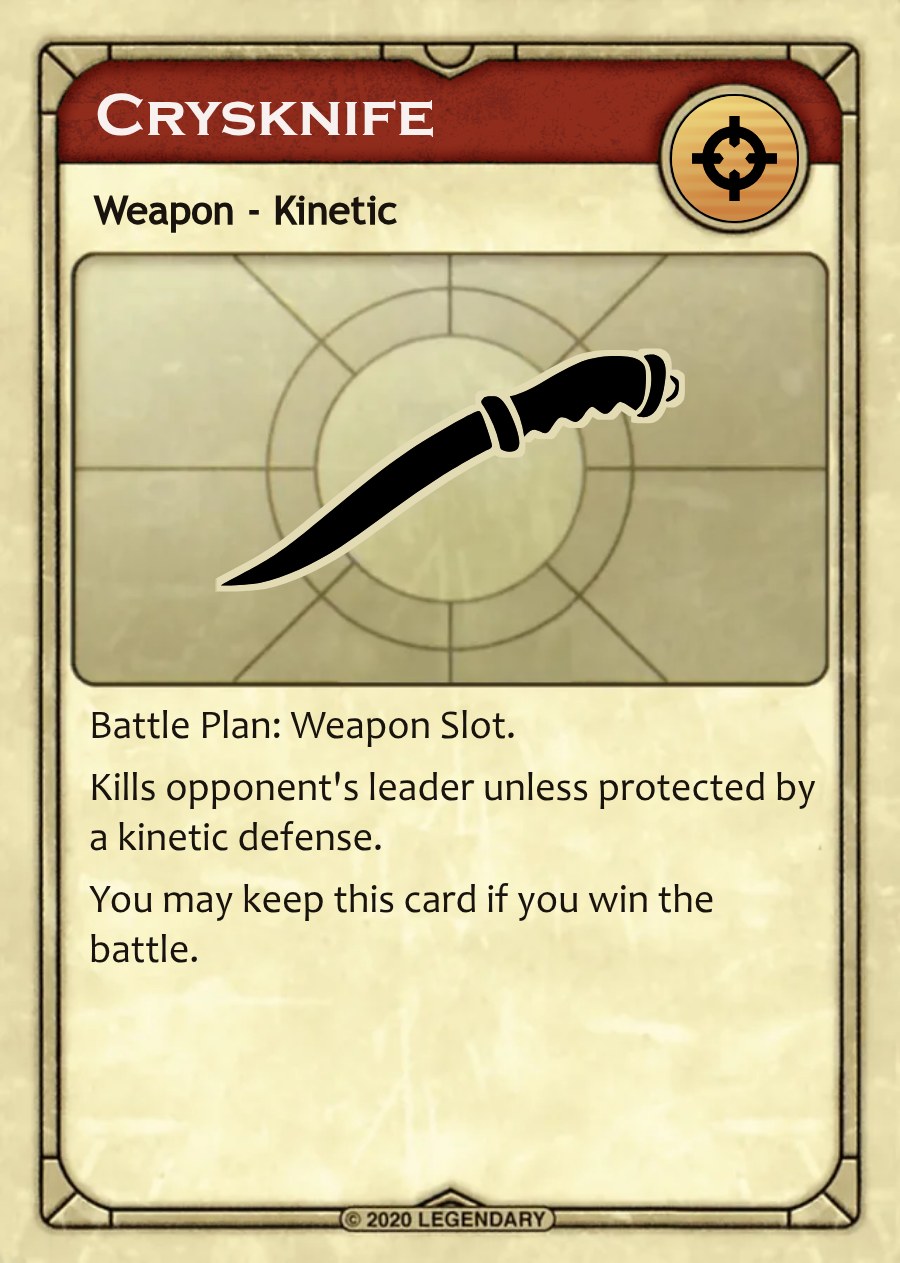
There are three types of weapons and defenses: kinetic, poison, and special. Some expansion special weapons are also considered the other types as well, indicated in their sub-title (e.g., Weirding Way). Weapons and defenses are only played in Battle Plans when a faction is in a battle. Weapons in a Battle Plan will kill an opposing leader (even a Cheap Hero) if not protected by an appropriate defense. For example, a kinetic weapon is blocked by a kinetic defense. Some special weapons are only blocked by a specific defense, or cannot be blocked at all.
When a faction wins a battle, a weapon and/or defense played in their plan may be retained and used in future battles (even in the same round), unless otherwise indicated. A player may always choose to discard any of the cards in their Battle Plan, even when they win a battle.
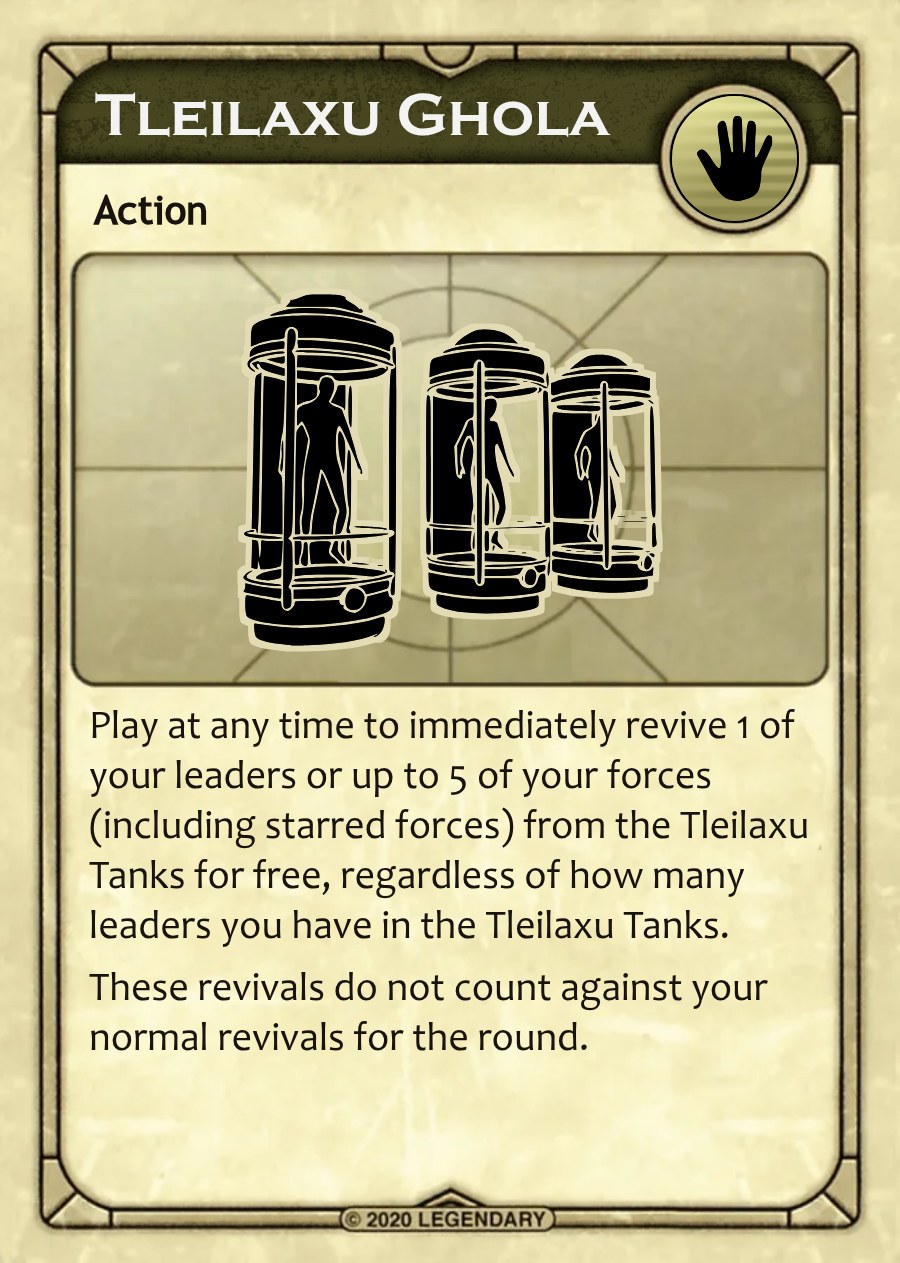
These cards provide a one-shot effect, and they are always discarded after their effect is fully resolved. Only Family Atomics is removed from the game after being played. If an Action card indicates it is played in a Battle Plan, it can only be played in that manner, and is always discarded, even if that player wins the battle.
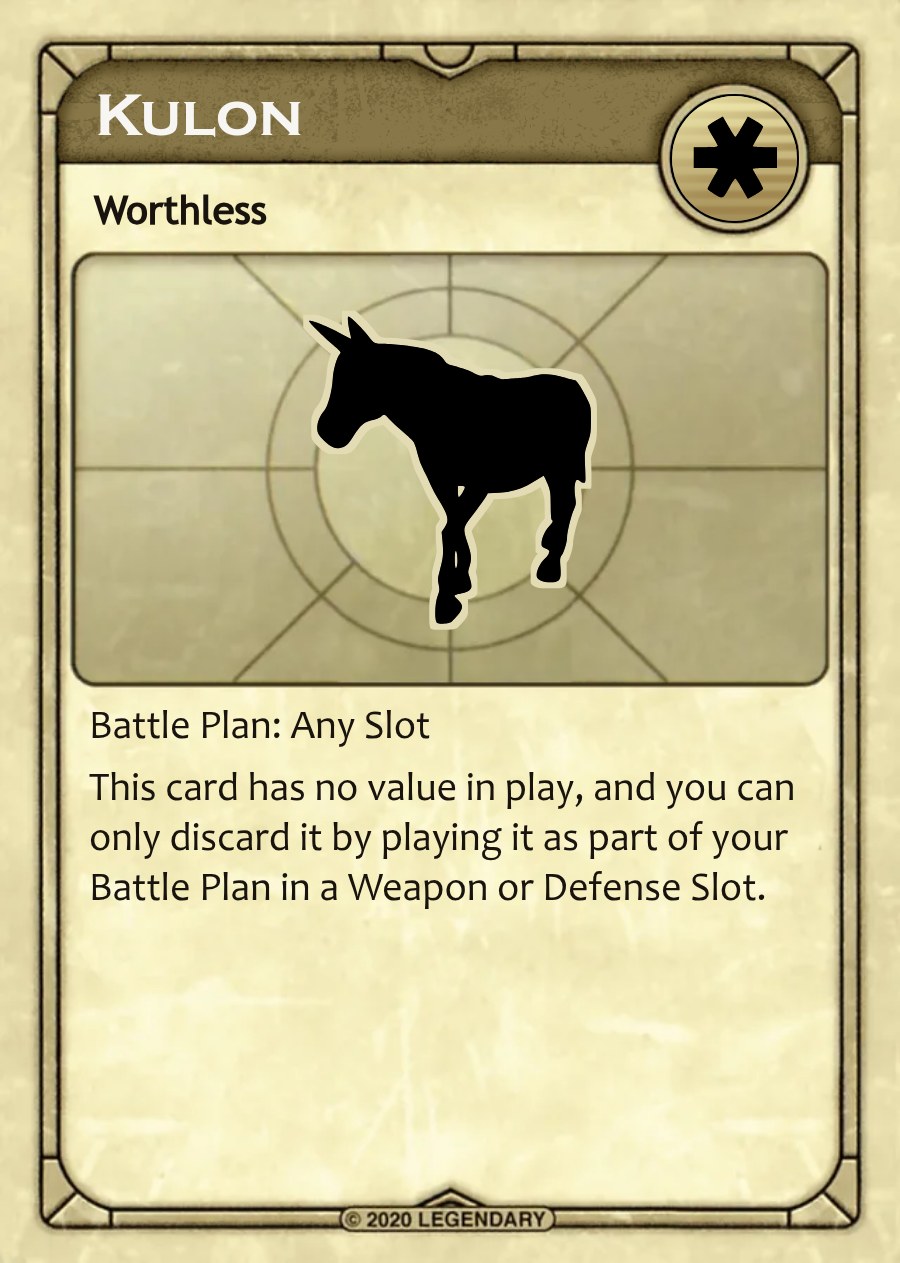
Worthless cards provide no effects normally, and they can only be discarded from a player's hand by being played in a Battle Plan in lieu of a weapon and/or a defense (unless an effect specifies otherwise). Once revealed in a Battle Plan, they must be discarded.
The Shield Wall starts the game intact. If a player uses Family Atomics, the Shield Wall is destroyed. Use the destroyed Shield Wall token to indicate it is no longer intact.
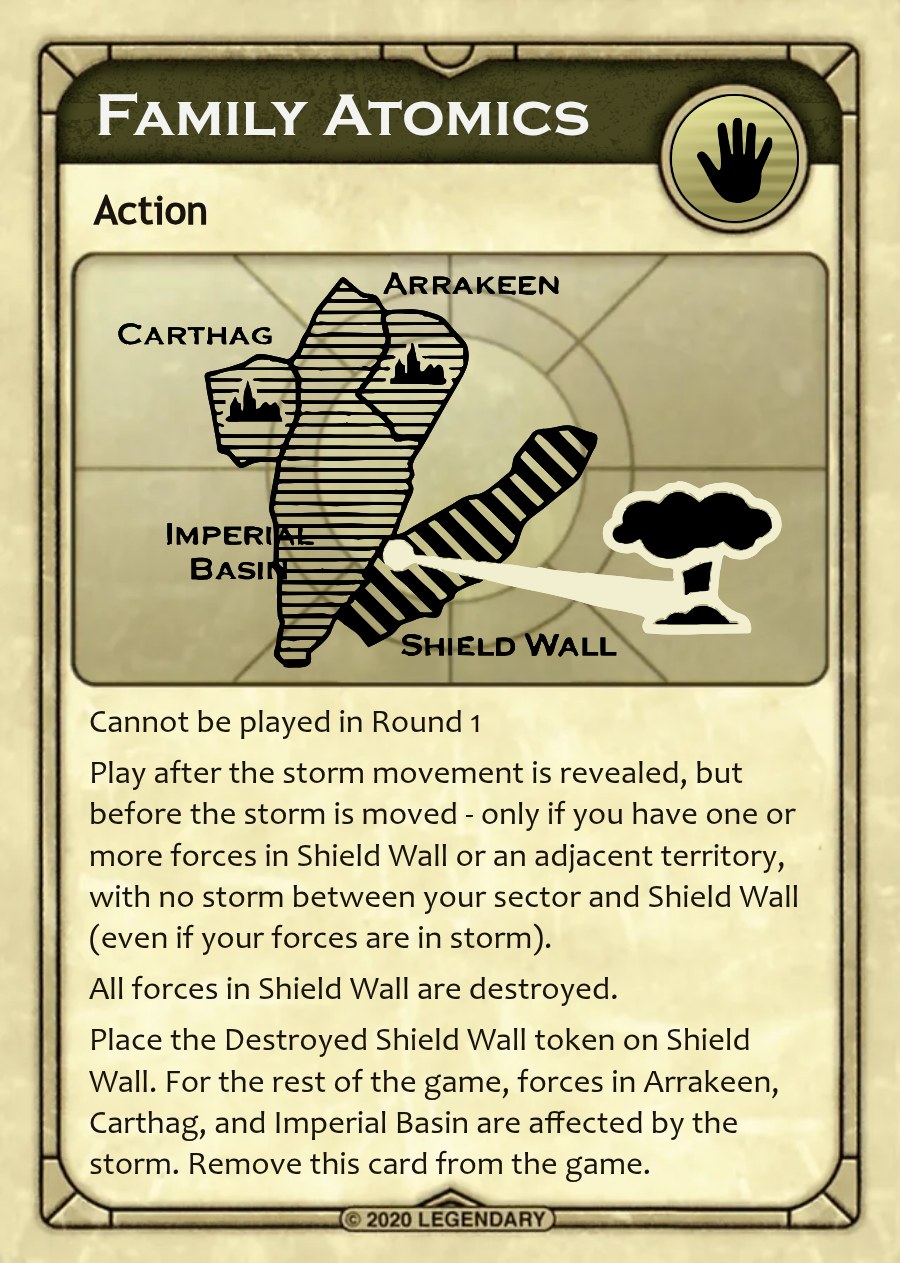
Once the Shield Wall is destroyed, Arrakeen, Carthag, and Imperial Basin are no longer safe from the effects of the storm. Forces in the affected sectors of those territories are sent to the Tleilaxu Tanks if the storm moves over them, or ends its movement over one of them.
Arrakeen and Carthag are still strongholds that count for the win. They also still provide ornithopters and carryalls, as well as providing 2 spice each in Spice Collection when occupied.
Some cards, like Family Atomics have instructions saying that they cannot be played in the first round of the game.
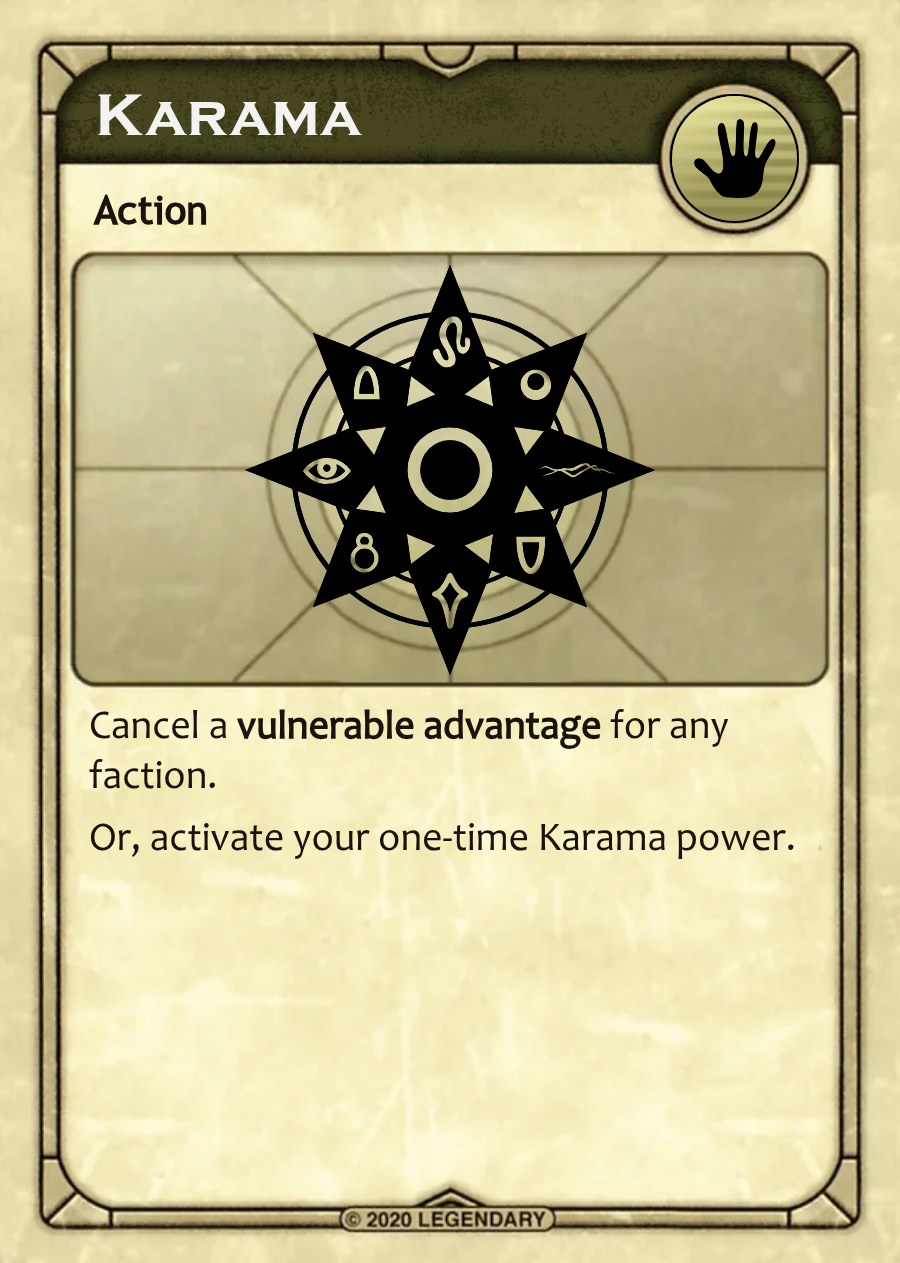
Karama cards are Treachery cards that allow factions to gain a once-per-game special power or to prevent one use of a rival's vulnerable faction advantage.
The Karama effects regarding the prevention of one use of a rival's faction advantage are indicated below, and on each faction's player screen:
Atreides: Cancel Battle Prescience advantage after knowing its intended effect for this battle.
Bene Gesserit: Cancel Voice advantage for this battle after hearing it.
Emperor: Before Battle Plans are made, force Sardaukar to count only as standard strength.
Fremen: Before Battle Plans are made, cancel Battle Edge advantage for this battle (free Spice Strength), Fremen can still spend spice for Spice Strength.
Harkonnen: Cancel capturing of an enemy leader in this battle after seeing battle results.
Spacing Guild: Cancel Spacing Guild's Fold Space advantage of taking their turn when they want to in the Shipping and Movement phase, but this must be played before they have deferred their own turn in storm order.
Player screens also show Karama effects regarding the prevention of one use of a rival's faction advantage for expansion factions.
Listed below are some additional insights into Treachery cards.
Cheap Hero: You cannot play a Leader disc and a Cheap Hero in the same Battle Plan.
Family Atomics: This can be played before or after revealing a Storm card. It may be played after Weather Control, if the player with Family Atomics is later in storm order than the player with Weather Control.
Harj: This must be played during the playing faction's turn in Shipment and Movement, giving them an immediate second Movement action. This second movement can be used for the same group of forces as the first Movement, or a different one. If a player ends their first movement with one or more forces in Arrakeen or Carthag, the second movement has access to ornithopters. If they do not have forces in Arrakeen or Carthag at the start of their second Movement action, they do not have access to ornithopters.
Karama: See above. In previous editions of Dune, these cards also had the effects that are currently assigned to Solaris (see below).
Kinetic Weapons/Defenses: In previous editions of Dune, these were called Projectile Weapons/Defenses. This terminology change was due to the fact that shields respond to the dynamics of an attack from a projectile like a Maula Pistol, but also to a knife that is not thrown.
Lasgun: A leader is not protected from the Lasgun with any defense, not even Weirding Way. Weirding Way does not trigger a Lasgun/Shield explosion, but a Shield-Snooper does (both Weirding Way and Shield-Snooper are expansion cards).
Poison: A category of weapon and defense.
Shield: This is a defense that protects a leader from a kinetic weapon. Note that Weirding Way is a card that can be a kinetic defense, but is not considered a Shield. Some effects will specify a Shield, and do not necessarily include non-Shield defenses.
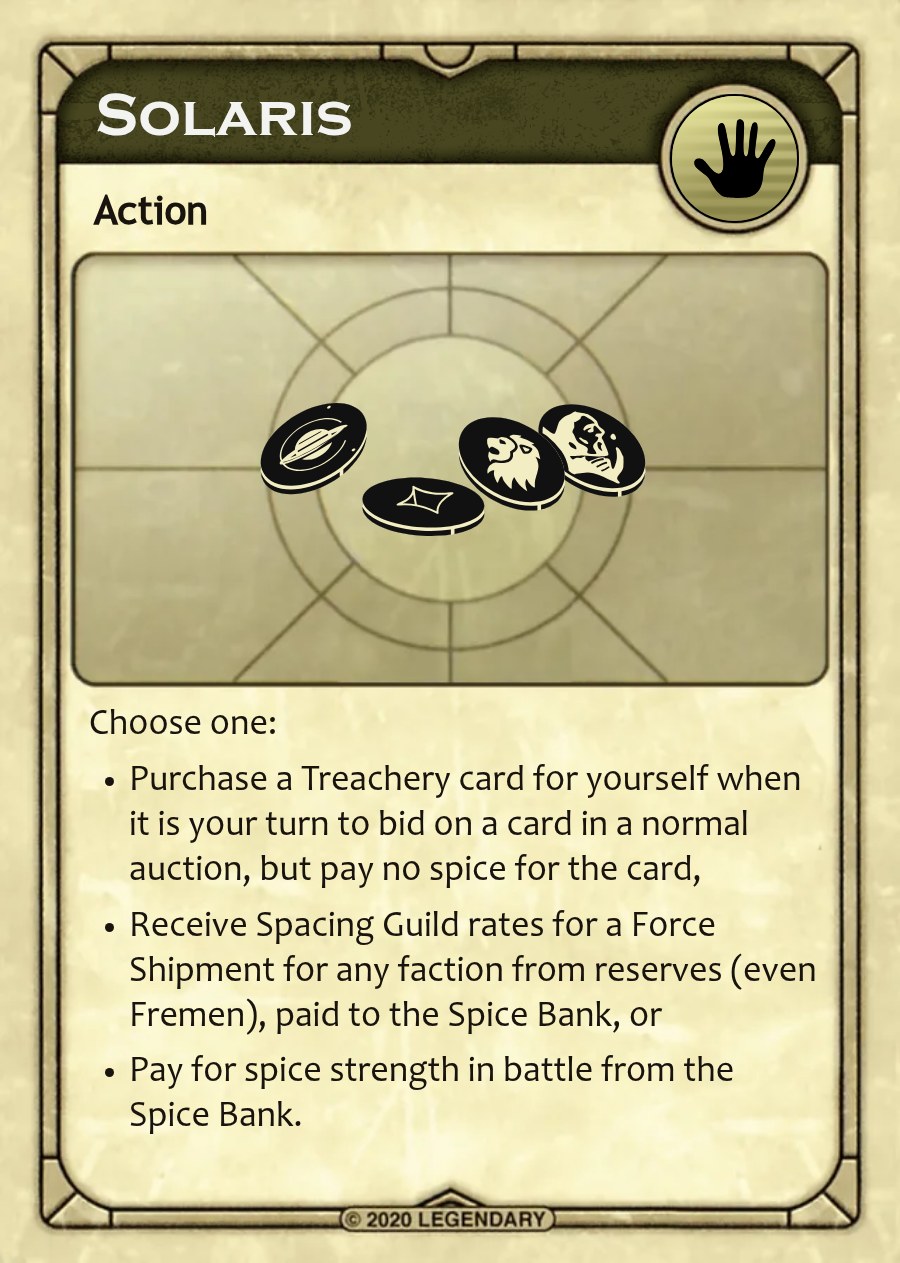
This has three possible effects: gaining a free Treachery card, Spacing Guild rates for any shipping action, and payment for spice strength. Spice strength is paid after Battle Plans are revealed. In previous editions of Dune, the first two of these effects were assigned to Karama.
Pay for spice strength in battle from the Spice Bank.
Tleilaxu Ghola: This card does not permit a player to revive another player's forces or leaders, but it does allow a revived leader to fight another battle in a different territory that round.
Truthtrance: This is not intended to force a player into committing a future action. The question asked should be the kind that could theoretically be verified independently (as it would in Tournament play, by an arbiter). When a question is asked that cannot be properly answered, it is not discarded, however a question meant to solicit an "I don't know" response is not permitted (e.g., "Does anyone have Stilgar as a traitor?", as a way to systematically ask about each of your leaders).
Weather Control: This can be played before or after revealing a Storm card. If played before, the Storm card is not drawn. It can be played after Family Atomics, if the player wishing to play it is later in storm order than the one playing Family Atomics.
Worthless Cards: These cards take up space in a player's hand, because they can only be discarded through use in a Battle Plan, in place of a weapon, defense, or both. Note that Bene Gesserit and CHOAM factions can use these cards in unique ways.
Spice now plays a different role in the combat procedure. These rules replace the "spice strength" rules.
Each force used in a battle is valued at its full strength if 1 spice is expended to support it. A force used in a battle that is not supported by 1 spice is valued at half strength.
When creating a Battle Plan, a player must hold the amount of spice they plan to expend in hand.
If a traitor comes up, the winner does not have to expend any spice. Otherwise, spice used in the Battle Plan must go to the Spice Bank, win or lose.
When dialing a Battle Plan, one-half increments can be indicated by lining up the line between the numbers with the line under the window of the Battle Wheel. Some examples are shown to the right.
When the battle winner takes losses, the player may do so in any manner as long as it agrees with the strength dialed and the spice expended.
For example, the Emperor player has 1 Sardaukar (worth 2 forces) and 5 ordinary forces in a territory in battle. The Emperor dialed a strength of 3 and expended 1 spice.



The Emperor player wins the battle, and they may choose to lose 1 Sardaukar force at full strength (2) and 2 ordinary forces at half strength (½ + ½),
or, they may lose 1 ordinary force at full strength and 4 forces at half strength (½ + ½ + ½ + ½). In one case, the player loses 1 Sardaukar and 2 ordinary forces. In the other case, the player loses 5 ordinary forces. Either choice fulfills the Emperor player's spice/strength requirement.
If using Spice Dialing, the Fremen Battle Edge advantage is changed to mean they are always considered full strength, without needing spice.
Note: This variant was originally considered an optional rule in the 1979 edition of Dune, and part of the "Advanced" rules in the 2019 edition.
Karama is a Fremen word meaning miracle, or an action initiated by the spirit world.
This variant gives each faction an additional way to trigger their once-per-game Karama power.
Faction sheets will name a specific Treachery card (or cards) that a player can choose to discard in order to use their Karama power. They may still only trigger this effect once per game, and they may not discard the specified card(s) to cancel any other faction's advantage (as if using an actual Karama card).
A Karama effect is not triggered when the Spirit World card is otherwise discarded normally, and one faction cannot discard another faction's Spirit World card in order to trigger the effect for them.
Example: House Atreides have their Golden Path Karama Power. In the Spirit World variant House Atreides would be able to activate this by using either a Karama Card or the Family Atomics card.
The Emperor has a greater chance of triggering their Warmachine Karama Power since there are multiple copies of Cheap Hero in the Treachery deck.

Your major handicaps are your low revival rate and having very little income. You should not allow large numbers of your forces to be sent to the Tleilaxu Tanks or you may find yourself without sufficient reserves to bring onto the planet.
Your strengths are that you have the ability to deploy forces for free each round as advisors, and you can win by correctly predicting the round another player will win the game and then secretly working for a favorable outcome. In addition, you can be quite effective in battles by voicing your opponent and leaving them weaponless or defenseless.
The next four pages contain a copy of the Faction Sheets for you to reference during your games.
The Bene Gesserit Sisterhood, represented by Reverend Mother Gaius Helen Mohiam — ancient and inscrutable, carefully trained in psychological control and a genius at achieving her ends through the efforts of others.
After Fremen placement (if in the game), start with one force token in any territory of your choice. If alone, place it as a fighter; if sharing a territory with another faction, place it as an advisor.
19 forces in reserves (off-planet), 5 spice, and 1 random Treachery card.
Free Revival: 1 force/round.
You are adept in the ways of mind control.
After step 1 of Game Setup (Positions), you secretly predict when one other specific faction will win, placing a Round Number card and a Faction card from your Prediction cards face down behind your Faction Screen. Place the unused Prediction cards face down back in the box. If the faction you predicted wins (alone or as an ally, even your ally) in the round you predicted, reveal your Prediction and win alone. You also can win normally. You cannot predict a win achieved via an advantage titled "Special Victory Condition".
You may force your opponent to play or not play any Treachery card matching a general type you name of weapon or defense (kinetic, poison, or special) in a Weapon or Defense slot in their Battle Plan. Other cards that could be played in a Battle Plan are not affected by Voice (e.g., Cheap Hero, Worthless cards, or Reinforcements). A card that is labeled as both special and kinetic/poison is affected by either command (e.g., Shield-Snooper). If your opponent cannot comply with your command, they do not have to admit their inability to comply and instead may do as they wish.
Vulnerable to Karama: Karama can be played to cancel this effect immediately after you have declared how you intend to use Voice.
You may use a Worthless Treachery card as a Karama card, canceling another faction's vulnerable advantage.
Alternatively, you may use a Worthless card as a Solaris card to buy a Treachery card for free when it is your turn to bid, allow any faction to ship at Spacing Guild shipping rates when they make a Shipping action, paid to the Spice Bank, or pay the cost of your spice strength in a battle from the Spice Bank.
You always receive CHOAM Charity of 2 spice regardless of how much spice you already have. This amount increases or decreases if any effect modifies CHOAM Charity.
Your forces have two sides, the striped advisor side and the fighter side without stripes. Fighters are considered standard forces. You can never have both types of tokens in the same territory, nor flip from one type to the other in order to ship or move to a territory containing tokens of the other type (i.e., flip fighters to advisors to join advisors already present, or vice versa) except by deploying an advisor using Spiritual Advisors - see below.
Whenever any other faction ships forces onto Dune from off-planet, you may deploy 1 advisor for free from your reserves into that same territory or into Polar Sink as a fighter. If the faction is shipping to a territory where you have one or more fighters, you may flip those fighters to advisors in order to deploy an advisor there. Your forces can only go to Dune as advisors when accompanying another faction's shipment in this manner.

You can afford to bide your time while casting subtle innuendos about who you have picked to win.
Any time before the Shipping and Movement phase begins, in any or all territories in which you have advisors, you may flip all of those advisors to fighters, announcing that you are doing so. Advisors may not otherwise flip to fighters. Advisors have no effect on the
play of the other factions whatsoever (even with your ally), and cannot collect spice, be involved in combat, prevent another faction's control of a stronghold, block a stronghold, use ornithopters, or allow you to play Family Atomics. Advisors are still susceptible to storms, sandworms, Lasgun/Shield explosions, atomics, and can trigger Terror tokens when entering a stronghold containing one.
When shipping on your turn you may only ship fighters, either into a territory where you already have fighters, or where you have no tokens (subject to storm and occupancy rules). When you move fighters into a territory occupied by another faction where you had no forces, they may instead flip to advisors (and must do so if ending their movement in a territory with your ally).
When another faction deploys, ships, or moves into a territory on Dune where you have fighters, you may immediately flip them to advisors.
Karama Power - None.

You may use your Voice advantage on your ally's opponent in battle, subject to Karama
Can Bene Gesserit compel the playing of Weirding Way as a defense?
No. Weirding Way is a weapon, and even if the opposing player has another weapon they could play in order to count Weirding Way as a defense, they are not required to do so. You could prevent the play of Weirding Way as a defense by Voicing "you may not play a kinetic defense". Similarly, a player cannot be compelled to play Chemistry as a poison weapon, though that could be prevented by Voice.
What is an example of using Voice on a Treachery card with multiple labels?
If you Voice "you may not play a kinetic defense", you would affect Shield-Snooper, which is labelled as Defense - Kinetic/Poison/Special. However, if you state "you may not play a poison weapon", it does not affect Gas Tooth, which is only labelled as special (despite it having an effect that is countered by a non-Snooper poison defense) - you would have to specify "you may not play a special weapon" to prevent it.
Does flipping to a fighter or advisor trigger a Terror token?
No. Only when a force token enters a stronghold containing a Terror token.
The Fremen, represented by the planetary ecologist Liet-Kynes — commanding fierce hordes of natives, adept at life and travel on the planet, and dedicated to preventing any outside control while bringing about Dune's own natural regeneration.
10 forces distributed as you like in Sietch Tabr, False Wall South, and/or False Wall West;
10 forces in reserves (in the southern hemisphere of Dune), 4 spice, and 1 random Treachery card.
3 forces/round.
You are native to Dune and know its ways.
Only half (rounded up) of your force tokens (standard or Fedaykin) caught in a storm are required to be killed, regardless of their strength (although you may choose to allow more or all of them to go to the Tleilaxu Tanks).
You may also ship, move your force tokens one territory, and ride sandworms into a storm at that half loss rate.
At the end of the Storm phase, you may look at the top card of the Storm deck.

Your major handicap is poverty. Usually you can't purchase Treachery cards for several rounds, since the others will outbid you. You must be patient and move your forces to spice blows or any vacant strongholds, keeping your force strength high. When you do battle, you can afford to dial high and sacrifice your forces, since they have a high revival rate and you can bring them back into play at no cost.
If Shai-Hulud appears in any territories where you have forces, they are not devoured. Upon conclusion of the Nexus, you may "Ride the Worm", moving some or all of the forces in those territories to any territory subject to storm loss and occupancy rules (any spice or forces in the destination territory are not destroyed).
During the Spice Blow and Nexus phase, all subsequent Shai-Hulud that appear after the first one drawn that phase may be placed by you in any sand territory you wish at the end of the Nexus, devouring any spice or opposing forces there. If placed in a territory where you or your ally have forces, they may Ride the Worm.
Your reserves are already on-planet; you do not ship using off-planet shipment rules. For your Force Shipment, deploy any or all of your reserves for free into The Great Flat or directly into any one territory within a distance of two territories of The Great Flat (subject to storm loss and occupancy rules).
During your Force Movement you may move your forces two territories instead of one.
Your three starred forces, Fedaykin, are worth two normal forces in battle and in taking losses. They are each treated as one force in revival; however, only one Fedaykin force can be revived normally per round (except by use of the Tleilaxu Ghola Treachery card).


You do not spend spice for spice strength, but automatically gain the spice strength simply by dialing the required number of forces.
Vulnerable to Karama: Karama may be played while Battle Plans are being formed. If this advantage is canceled by Karama, you may still spend spice normally for spice strength.
The following one-time ability is triggered by playing a Karama card:
Call a Shai-Hulud during the Spice Blow and Nexus phase. This is counted as if Shai-Hulud was drawn, but you immediately decide if sandworms appear in the territories of the last Spice Blows card, or if a sandworm will be placed in any sand territory by you at the end of the Nexus (as if using Call Sandworms).
Spirit World Variant: Harj.
If no faction has won by the end of round 10, and if you (or your ally, or no faction) occupy Sietch Tabr and Cave of Birds, and neither House Atreides, House Harkonnen, House Richese, nor Emperor occupies Tuek's Sietch (unless allied with you), then you (and your ally) win the game.
You may protect your allies from being devoured by sandworms and allow them to Ride the Worm after the Nexus. You may also allow your ally to increase their free revival to 3 forces. In addition, your ally wins with you if you win with the Fremen Special Victory Condition.
Can the Fremen Ride the Worm from The Great Flat to Arrakeen if the storm is over the sector with Carthag?
Yes. You are not required to trace your path when riding the worm. Those forces can simply go to any territory not in storm, or to one in storm at half losses.
Can Fremen ship into a territory in storm, then move another territory also in storm?
No. They are limited to either shipping into a sector of a territory in storm, or moving into one. When Riding a Worm into storm, they can go directly to any one sector of a territory in storm.
You have the advantage of better mobility than factions without a city stronghold, and you have the strongest pool of fighting leaders, but limited range in shipping (and only directly into one stronghold). Your game plan will be to bide your time and wait for accessible spice blows in order to build up your resources for Treachery cards. Having forces at spice blow locations increases your chances of riding the worm anywhere.

Your major handicap is that you start with no forces on the map and must ultimately ship them all in. Doing so early may require battles before you are prepared. Even though you do not need to forage for spice on the surface of Dune often, you still are quite subject to attack since you are likely to concentrate on the cities for the mobility they give you.
On the plus side, you will never need spice badly, since the bidding will keep you supplied. Keep your Sardaukar handy, and try to avoid losing too many in one round, since you can only revive 1 at a time.
His majesty the Padishah Emperor Shaddam IV — keen and efficient, yet easily lulled into complacency by his own trappings of power. By leveraging his legions of Sardaukar, the Emperor will secure his legacy.
20 forces in reserves (off-planet), 10 spice, and 1 random Treachery card.
1 forces/round.
You have access to great wealth and elite forces.
Whenever any other faction pays spice for a Treachery card during Bidding, they pay it to you instead of the Spice Bank. You cannot discount the price of Treachery cards; the full price must be paid. Your own payments go to the Spice Bank normally.
Your five special forces, elite Sardaukar, are worth two standard forces in battle for dialing, and taking losses, though against the Fremen they are worth just one force each. Sardaukar are treated as a single force token for revival and shipping; however, only one Sardaukar force can be revived normally per round (additional Sardaukar may be revived by your one-time Karama power, see below, or the Tleilaxu Ghola Treachery card).
Vulnerable to Karama: Karama may be played while Battle Plans are being formed to force your Sardaukar to count as one force each for that battle.
Sardaukar and two standard forces:
If you dial a 2, you can spend 2 spice for a +1 spice strength - if you win, you can either send two standard forces to the Tleilaxu Tanks or one Sardaukar.
If you instead dial a 4, you can spend 4 spice for a +2 spice strength - if you win, you can either send both Sardaukar to the Tleilaxu Tanks, or one Sardaukar and both standard forces.
The following one-time ability is triggered by playing a Karama card
During the Revival Phase revive up to four forces (including Sardaukar) and one leader for free. These revivals do not count against your normal revivals for the round.
Spirit World Variant: Cheap Hero.
You may give any amount of your spice to your ally at the end of any phase. Unlike spice exchanged for bribe and deals, this spice is placed directly behind your ally's Faction Screen. Additionally, when your ally spends spice in Battles for spice strength, the cost is half. For example, to gain +2, it costs your ally 2 spice instead of 4.
What is an example of Emperor's ally paying for a Treachery card purchase?
When their ally buys a card, they pay the Emperor normally. This can essentially be like the ally has gotten a card for free, since the Emperor could have given their ally spice before the Bidding phase began. Any amount that the Emperor must pay goes to the Spice Bank. Payment from both players occurs simultaneously, so an Emperor with zero spice could not help pay for their ally's card.

You are handicapped by the fact that you must both purchase cards and ship onto Dune, and you have no source of income other than the spice on the planet's surface or whatever bribes you can solicit for card information. This may keep you in frequent battles. Since you start from Arrakeen, you have the access to ornithopters from the outset, and it is wise to protect this.
The Atreides, led by the compassionate, though cunning, Duke Leto and his son Paul Atreides — rightful heir to his family's ancient legacy, gifted with valiant lieutenants and a strange partial awareness of the future. Both are beset by treacherous opponents.
10 forces in Arrakeen, 10 forces in reserves (off-planet), 10 spice, and 1 random Treachery card.
2 forces/round.
You have limited prescience.
Any time during the Shipping and Movement phase, you may look at the top card of the Spice deck.
During the Bidding phase, you may look at each Treachery card as it comes up for auction before any faction bids on it. You, and only you, may keep written records about Treachery cards.
During the Battle phase, you may force your opponent to reveal to you your choice of one of the four elements they will use in their Battle Plan: the leader (disc or Cheap Hero), Treachery card in the Weapon slot, Treachery card in the Defense slot, or number of force strength dialed plus spice strength. An opponent revealing that they are not playing the particular element asked (e.g. no leader, an empty slot or zero strength) does not allow you to then demand to see another element instead.
Vulnerable to Karama: Karama can be played to cancel this effect immediately after you have named what you are using Battle Prescience to see.
The Kwisatz Haderach token starts out inactive. Use the Kwisatz Haderach card and counter token to publicly keep track of force losses. Immediately after you have lost 7 or more forces in battle (even from a Traitor call), the Kwisatz Haderach token becomes active for the rest of the game and may be added to your Battle Plan (along with a leader) in one territory per round; used as follows:
Add +2 strength to your Battle Total if the leader or Cheap Hero is not killed.
A leader accompanied by the Kwisatz Haderach cannot be called as a Traitor.
The Kwisatz Haderach can only be killed if blown up by a Lasgun/Shield explosion. If killed, the Kwisatz Haderach may be your 1 leader revival during the Revival phase (even if you have not yet triggered leader revival) for 2 spice.
The Kwisatz Haderach does not need to die for you to be able to revive your other leaders and can be revived before all your other leaders have died.
The following one-time ability is triggered by playing a Karama card:
Look at any one player's entire Battle Plan (not just your opponent). This cannot be canceled by Karama.
Spirit World Variant: Family Atomics.
You may force your ally's opponent to reveal one element of their Battle Plan to you and your ally, following the rules of your Battle Prescience advantage, subject to Karama.
Your spice vision allows you to avoid being devoured by the sandworms and helps you to get a head start on the Spice Blows. In addition, you can gain some slight advantage over those who would battle you by your foreknowledge of one element of their Battle Plan. Work to unlock your Kwisatz Haderach advantage by battling over spice, or even negotiated surrenders to block Arrakeen.

Your major handicap is your difficulty in obtaining spice. You are at your greatest relative strength at the beginning of the game and should capitalize on this fact by quickly buying as many Treachery cards as you can, and then surging into battle, or better yet, extorting spice from other factions. Since you get two cards for every one you purchase, you can afford to bid a little higher than most.
The Harkonnens, led by the decadent and notoriously cruel Baron Vladimir Harkonnen — master of treachery and sinister deeds, value power over all. The path to power leads to Arrakis, and the control of spice.
10 forces in Carthag, 10 forces in reserves (off-planet), 10 spice, and 2 random Treachery cards.
2 forces/round.
You excel at treachery.
At the start of the game, keep all 4 Traitor cards you are dealt. If you have drawn any of your own leaders, you may reveal some or all of them, and then set them aside. Before any other Traitor cards are returned to the Traitor deck by other players, redraw that many cards from the Traitor deck if possible. Keep the new ones, even if any are your leaders, and then shuffle the set aside cards back into the deck.
Your hand limit is 8 Treachery cards; when you have 8 Treachery cards you must pass during bidding. Every time you buy a Treachery card you must take an extra Treachery card for free from the top of the Treachery deck unless it would put you over your hand limit.
When you win a battle, you may choose to capture a leader from your opponent. Randomly select 1 available leader (including the leader used in the battle, if not killed, but excluding all leaders used elsewhere that round, already captured, or in the Tleilaxu Tanks). After secretly looking at the captured leader you must decide to either 1) place the leader in the Tleilaxu Tanks to gain 2 spice from the Spice Bank; or 2) keep the leader behind your Screen for a one-time use in any of your battles. If used in a battle, and not killed, you must then return that leader to its faction. The identity of the captured leader is not required to be revealed.
When all of your own Leader discs are unavailable to you (killed, captured, or face up on the board from previous battles), you must immediately return all captured leaders to their factions. Killed captured leaders can be revived by their factions (subject to the normal revival rules). Captured leaders used in battle may still be claimed as a Traitor (subject to the normal Traitor rules): If you use a leader against its own faction and they are holding that leader's Traitor card as a "safe leader", it may be revealed as a Traitor, winning them the battle in accordance with normal rules for revealing a Traitor.
Vulnerable to Karama: Karama may be played to cancel your Capture Leaders advantage immediately after you win a battle, but before the captured leader is drawn.
The following one-time ability is triggered by playing a Karama card:
At the end of the Bidding phase, take a random Treachery card from each other player and one from the top of the Treachery deck into your hand. Then choose one card from your hand to give to each player (and discard one if you have 9 cards). This action has no effect on your hand limit.
Spirit World Variant: Solaris.
Traitor cards that you hold may be used against your ally's opponent if you so choose. The results of their battle are treated as if your ally called Traitor.
However, if you spend too lavishly at first, you will not have enough spice to ship in forces, or buy more cards at a later time. The large number of cards you may hold will increase your chances of holding Worthless cards. To counteract this, you should pick your battles, both to unload cards and to flush out the traitors you control at critical times.

Your major handicap is your weak array of leaders and your inability to revive quickly. In addition, you often cannot buy Treachery cards at the beginning of the game. You are vulnerable at this point and should make your stronger moves after building up your resources. If players do not ship on at a steady rate you will have to fight for spice on the surface or collect only the isolated blows.
The Spacing Guild, represented by Navigator Edric, monopolist of transport, yet addicted to ever increasing spice flows, must ensure that trade continues unabated.
20 forces in reserves (off-planet), 8 spice and 1 random Treachery card.
After step 5 of Game Setup (Forces), you must make a single shipping action to the board (subject to Bene Gesserit Spiritual Advisor advantage).
1 force/round.
You control all shipments to and from Dune.
You may take your turn in the Shipping and Movement phase out of turn (both actions in the normal sequence). This allows you to go first, last, or in between other players' turns. The rest of the factions must make their Shipping and Movement actions in the proper sequence. You do not have to reveal when you intend to take your turn until the moment you wish to take it.
Vulnerable to Karama: If canceled by Karama, you must take your turn in normal order. Karama cannot be played after your normal turn order has already passed.
When other factions ship forces onto Dune from their off-planet reserves, they pay the spice to you instead of the Spice Bank.
As your Force Shipment action you may make one of three types of Force Shipment actions each round, subject to storm and occupancy rules:
Ship normally from off-planet reserves to Dune.
Cross-ship any number of your forces from one territory to any other territory on the board.
Ship any number of your forces from one territory back to your reserves.
You pay only half the normal fee (rounded up) when shipping to or from Dune. For cross-shipping, you pay normal shipping rates.
The following one-time ability is triggered by playing a Karama card:
Stop one off-planet shipment of any one player.
Spirit World Variant: Weather Control.
If no one has been able to win the game by the end of play, you win if you control as many or more strongholds as whichever faction controls the most strongholds (regardless if that faction is in an alliance). If allied, you and your ally together must be in as many or more strongholds as the faction or alliance controlling the most strongholds.
Allies may ship from their reserves onto Dune, from Dune back to reserves, or cross-ship from one territory to another with forces that are already on Dune per your Guild Rates advantage (even the Fremen). Your ally wins with you if you win with your Special Victory Condition.
What is an example of the Spacing Guild helping an ally pay for shipping?
If the shipping cost is 4 spice, and the ally can only afford half, they pay 2 to the Spacing Guild, but the Spacing Guild pays the other 2 to the Spice Bank. Any amount the Spacing Guild must pay goes to the Spice Bank. Payment from both players occurs simultaneously, so if the Spacing Guild had zero spice, they could not help pay for shipping.
What is an example of Spacing Guild winning with the Special Victory Condition?
If Spacing Guild is not in an alliance, they need only be in as many strongholds as the faction in the most strongholds to win. If they are in 2 strongholds, and Atreides is in 2, Spacing Guild wins. This is true if Atreides is allied with Bene Gesserit, who is in 1 stronghold. If Spacing Guild was allied with Emperor in this same scenario, Emperor would need to be in 1 stronghold as well (both alliances in 3 strongholds).
Your major advantage is that you can take your turn whenever you want in the Shipping and Movement phase, and ship onto Dune inexpensively (and from any one territory to any other). This mobility allows you to make surprise moves and is particularly useful when you are the last player in the Shipping and Movement Phase.
If the game is out of reach and well along, try battles against the strongest players to weaken them and prevent a win. Then the victory is yours if you can tie with the player in the most strongholds.
The Atreides family had governed the planet, Caladan, for twenty generations. In that time, their continued impartial and efficient leadership had earned for them the respect of their noble peers throughout the Imperium and, gradually, they began to acquire more and more influence in the noble assembly, the Landsraad. The present head of the Atreides family, Duke Leto, had just been selected as the unofficial spokesman for the Landsraad, its highest position.
This growing influence of the Atreides was viewed with great concern by a powerful personage of no less rank than the Padishah Emperor, Shaddam IV, himself. Shaddam had grown politically war-wise in a regime long hoary with intrigue and corruption. The emergence of the upright and charismatic Duke Leto as a powerful leader of the nobility, he realized, could be a very real threat to his own position.
His simplest solution would be to send his fanatical police army, the Sardaukar, to arrest Duke Leto. Unfortunately, the Duke's character was so exemplary that no believable pretext for his arrest could be devised. A more subtle and serviceable plan began to creep into his devious mind. Why not reward Leto for his services to the Empire with a promotion to the governorship of a new and more important planet, Arrakis. He knew that the present governor of Arrakis, Baron Harkonnen, would not give up this planet without a struggle and would prepare a trap to surprise the Duke and his family when most vulnerable - just after arrival on their new planet. In fact, he would secretly aid the Baron by loaning him Sardaukar disguised in Harkonnen livery. If Duke Leto refused the governorship, he would be ostracized by his fellow nobles and forced to become a renegade. Either way Shaddam IV would be rid of him.
For thousands of years, the religious and semi-mystical sisterhood of the Bene Gesserit had groomed the peoples of the Empire to prepare for a messiah, a Kwisatz Haderach. To achieve this end, they had trained themselves to influence and impress the people by a combination of religious mysticism and the power of their Voice - the ability to control others merely by selected tone shadings of their voice. They also had secretly conducted a rigorous and careful genetic program to match mates with the ultimate object of producing a Kwisatz Haderach - one who through his genetically developed ability to contact higher dimensions could utilize the insights gained to bring a new order to the universe.
The Bene Gesserit were upset with one of their sisters, the formal concubine to Duke Leto Atreides, Lady Jessica. As one of the final agents in their breeding program, she had been instructed to bear a female child who was then to marry Feyd-Rautha Harkonnen, the Baron's nephew. There was a high probability that a male offspring of that union would be a Kwisatz Haderach. For some reason never quite understood, even by herself, Lady Jessica upset the program by bearing a son. This boy, named Paul, became the direct heir to the Atreides line and, along with his mother, was now accompanying his father to the new planet. The sisters would have to watch the events as they unfolded on Arrakis very carefully or they might just lose their genetic investments.
Duke Leto was aware of the true significance behind the Emperor's magnanimous gesture. He and his human computer mentat, Thufir Hawat, had analyzed the situation and devised a plan - one that might bring them out of the danger alive. Very little concern had been given to the Fremen, the natives of Arrakis, by either the Emperor or Baron Harkonnen. In fact, they considered them little more than small bands of raiders not worth any serious consideration. Yet Thufir Hawat discovered that these natives were much more numerous than ever supposed by the Imperium and it was well known that they hated the despotic rule of the Harkonnens. A secret alliance with these natives might be just enough to stave off the impending blow. The only real worry was gauging their fighting ability. Nothing was really known about the Fremen. They were as mysterious as the planet they inhabited.
Arrakis (or Dune as it is referred to by all of its inhabitants) had one of the most inhospitable surfaces on any planet in the Imperium. There was practically no water to be found anywhere. Except in a few civilized areas into which tremendous amounts of water had to be continually imported at an exorbitant price, the only way a human could survive the aridity was by wearing a stillsuit. This unit would continually recycle the body's water thereby preventing any from escaping into the atmosphere. Without a stillsuit or an imported water supply, a body would be unable to replace even the water lost through perspiration. In this dry environment, tremendous Coriolis sand storms often reached speeds of up to 700 kilometers per hour. They could eat flesh off bones and etch the bones to slivers. No being could survive these storms if caught in the open. There were also strange giant creatures often a quarter mile in length called Shai-Hulud by the Fremen or sandworms by everyone else. These sandworms lived in the deserts which covered most of the planet.
The slightest noise or vibration would be sufficient to arouse and attract sandworms for miles around, any one of which could swallow a house without a moment's pause. Only in the towns and few rocky ridges that crisscrossed through the deserts was one safe from these monsters.
It would seem that such a forbidding place would hardly be the likely setting for the events that were about to transpire. Yet how often underneath a harsh surface is found a cache of great value. There was one item valued above all others in the universe and there was just one place where it could be found. The item was melange and the place was Dune. Melange was a spice found only in the deserts - a by-product of the sandworm metamorphic life cycle. It awarded to its consumer prolonged life and prescient abilities. It was so highly prized that the entire economic structure of the Imperium was based upon it. Space navigation was not possible without the prescient abilities it conferred. Laws must be obeyed, properties must be observed but let no man restrict the flow of melange spice from Dune for whatever reason.
Like the planet they lived on, the features of the Fremen were harsh, desiccated and uninviting. Yet, also like the planet, there was hidden a spirit inured to hardship and dedicated to the ideals necessary for survival. It was the stuff of which great fighters were made and it was this hidden asset that Duke Leto hoped to exploit to his advantage.
Even as Duke Leto was preparing for his journey to Dune, yet another party was watching the situation very closely. The Spacing Guild had a monopoly on all space transport and along with the Emperor and the Landsraad formed the triumvirate that controlled the Imperium. The Spacing Guild guarded its monopoly zealously as it was its only basis for power. No one could travel anywhere through space except in a Spacing Guild spacecraft. Anyone who infringed upon its monopoly or broke its rules was immediately denied all space transport. The Spacing Guild had just one weakness, it could not navigate in space without the melange spice. It was more dependent upon the spice flow than all the others. They, too, would have to monitor the impending conflict on Dune very closely and, perhaps, even actively interfere if the flow of spice were to be threatened.
As Duke Leto and his forces arrived at their dune residence, Arrakeen, nothing seemed amiss. Every object had been carefully checked for traps and poison by the advance party. Envoys sent to the Fremen reported back favorably in regards to the alliance against the Harkonnens. Perhaps the transfer of power would occur without difficulty after all. Suddenly, the blow struck and it came unexpectedly from within. Dr. Yueh, the family Suk doctor, and one who had undergone Imperial conditioning (the highest conditioning against taking human life), had turned traitor. His training had been subverted by Baron Harkonnen who held the doctor's wife as hostage. The doctor secretly turned off the House shields and drugged the Duke and his family to coincide with the Harkonnen surprise attack. He did his job well and the combination of surprise and the additional Sardaukar force was enough to overwhelm the defenders. The Duke was captured to be delivered to the Baron and many of his forces were killed.
Paul and his mother, Lady Jessica, just barely escaped in an ornithopter, a birdlike flying machine, into the desert. For the Baron, victory was complete. From the triumvirate came a sigh of relief, the internecine squabble had been concluded and even though an important noble had been eliminated, the spice would continue to flow.
The Baron was not finished, though. The Fremen had interfered with his destruction of the Atreides forces by helping the remnants to get away. He decided to get rid of the native scum once and for all and gave his nephew, and Feyd-Rautha's brother, the 'Beast' Rabban Harkonnen, the power to initiate a pogrom to eliminate the Fremen from the face of the planet. The Emperor even loaned the Sardaukar (still disguised in Harkonnen livery) to help.
Several years passed and stories began to filter back to the Baron. The program was not proceeding as well as expected. There were reports of raids of increasing intensity on the outlying villages conducted by specially trained Fremen troops called Fedaykin. These raiders were inflicting many more casualties than they were receiving, and the harvesting of spice was beginning to suffer. Especially alarming were the reports of a messianic leader called Muad'Dib who was organizing, training and leading these Fremen to victory after victory. The cutback in spice was beginning to cause serious repercussions throughout the Imperium. A decision was finally made at the highest level for a cooperative and concerted effort by the Emperor; the Landsraad and the Spacing Guild to aid Baron Harkonnen in destroying the Fremen resistance forever.
Meanwhile how had Lady Jessica and Paul fared? Having survived a sand storm and a sandworm, they were trapped by a band of Fremen who, following their law of survival, were about to kill them for their water. Because Paul had been specially trained since birth in weapons fighting, Mentat computing and the Bene Gesserit ways, he demonstrated an extraordinary ability to maintain control of the situation. He and his mother so impressed the band that they decided to take them back with them to their sietch, an underground stronghold where the Fremen made their home. Many centuries before, the Bene Gesserit had prepared the Fremen for the coming of the Kwisatz Haderach by a prophecy. A Bene Gesserit and her offspring would hold the key to the Fremen future. Perhaps these visitors were the fulfillment of the legend. Whether or not they were, their abilities could be used to aid the fight against the Harkonnens.
Paul, himself, began to see strange visions and gradually became more and more aware of a great revolt, a jihad, that he would lead. This awareness of his own destiny began to confirm his own suspicion that he might be the Kwisatz Haderach. A final test with the Water of Life convinced him that he was indeed the one the Bene Gesserit sought.
The next few years were spent in training and preparing the Fremen for the terrible purpose ahead. The first step would have been the restoration of himself as his father's son to his rightful place as Governor of Dune. The sides had been chosen and the final confrontation was at hand.
On paper, the Harkonnens, Emperor, Spacing Guild and Landsraad alliance seemed overwhelming when compared to the Fremen forces that Paul could muster. But Paul had a few surprises of his own ready. Not all of the alliance force was on the planet, only enough deemed sufficient to stamp out the Fremen uprising. The remainder of the force was in orbit as an emergency reserve. Paul realized that by threatening to destroy all spice, he had the leverage to force the Spacing Guild to his side. The final result of this switch meant that none of the reserve would land on the planet because, of course, the troops were on Spacing Guild spaceships. That reduced the strength imbalance considerably. Now he only had to deal with the advance force which was conveniently in camp preparing for their campaign.
Calling upon his newly realized powers, Paul summoned a tremendous sand storm to cover his ambush. Quietly and quickly he distributed his troops behind the Shield Wall protecting the Imperial forces and waited for the right moment. As soon as the sand storm passed over the wall and into the camp, Paul used his family atomics to blow a gaping hole in the wall. The Fremen poured through riding on the backs of the sandworms! The surprise was complete and the battle over quickly. Paul had regained his rightful title to Dune. So ends the first book of the Dune series.
Note: Some of the terminology here references expansion factions.
Available: Your leaders (typically behind your Screen) that are not dead or captured, nor have battled in a different territory that round.
Being Formed: Battle Plans are not finalized until they are ready to be revealed. Effects can cause a player to change their Battle Plans before revealing (e.g., Battle Prescience, Voice, Truthtrance, Karama).
Bribe: Spice paid to a non-ally as part of a deal. This spice is not available immediately, but is collected in the Mentat Pause phase.
Captured: Any Leader disc of a faction that is held by another faction (e.g., Harkonnen Capture Leaders advantage, or Tleilaxu Ghola advantage). Does not apply to Duke Vidal while held by Moritani or Ecaz's ally through the Ecaz ambassador.
Card Knowledge: Having information about specific cards or types of cards, of any kind: Treachery, Traitor, Prediction, Nexus, etc. For example, cards in hand, cards sold in auction, Ixians Market Manipulation advantage, cards seen and shuffled into a deck.
Carryalls: A faction with forces in Arrakeen and/or Carthag has a spice collection rate of 3 spice per force in the Spice Collection phase while collecting spice from spice blows.
Control: A faction controls a stronghold if they alone occupy it at the end of the round. This is the only time control is determined, and it does not carry over into the next round. Bene Gesserit advisors cannot control a stronghold, nor affect whether another faction controls it.
Deploy: An effect that allows you to place forces into a territory. This does not count as a shipment, and no Bene Gesserit advisor may accompany it.
Forces: A player's tokens as military units. They can have differing values (e.g., Fedaykin valued at 2 each, Suboids at 1/2 each) or different states (e.g., Bene Gesserit advisors and fighters).
Full-Dial: When a player dials their maximum number (or strength) of forces in a battle.
In Storm: When the storm covers a sector, the portions of all territories (and any forces in them) in that sector are considered "in storm".
Initiative: The active player earliest in storm order. This player will choose the order of their battles, and win any ties. Initiative moves to the next player in storm order when the current one has no battles left.
Occupancy Rule: When two factions occupy a stronghold, no other factions may enter that territory unless an effect allows them to do so.
Occupy: When a faction has forces in a stronghold, they occupy it. Advisors do not count as occupying a stronghold.
Opponent: A player with whom you are battling.
Ornithopters: If a faction starts their Force Movement action with one or more forces in Arrakeen and/or Carthag, they may move any single group of their forces up to three territories.
Payment: Spice given to a player due to a faction advantage (e.g., paying Emperor for purchasing Treachery cards), which would then go behind their Faction Screen and is available for immediate use. Bribes are not considered payments.
Pocket Card: The Treachery card(s) dealt to a player during Setup.
Rival: Any player with whom you are not allied.
Secret Information: Any knowledge pertaining to hidden information: card knowledge, identity of face down tokens, etc.
Secretly: Without revealing to other players. If you secretly select a card, you are choosing it without others seeing what you choose. If you are secretly showing or revealing something to another player, they get to see it but others do not (though all players get to know this transaction is taking place).
Sector: One of the 18 wedge-like divisions around the board used for determining the location of the storm's effect. Polar Sink is not considered in any sector.
Set Aside: Placed near the play area for public view, but not considered "in play" or controlled by any player.
Slot: Virtual space on Battle Wheel for weapon/defense.
Storm Order: Proceeding counter-clockwise, starting with the First Player when applicable.
Stronghold Blocking: Moving into a stronghold when another faction is there, thereby blocking other factions (particularly one poised to win) from entering. This is often done as part of a deal, but doesn't need to be.
Supply: A pool of available tokens, cards, or resources not considered part of a player's hand, but nevertheless under their control.
Territory: A space on the map (board) of Dune. Territories can span several sectors. There are four different types of territories: desert, rock, stronghold, and Polar Sink.